How to Fix Toaster Not Heating: Easy and Effective Solutions

How to Fix Toaster Not Heating: Easy and Effective Solutions
If your toaster isn’t heating, start by checking the power source, cleaning crumb buildup, and inspecting the heating elements. Simple fixes like resetting the toaster or replacing a faulty fuse often restore heat quickly. This guide walks you through easy, practical steps to get your toaster working again safely and efficiently.
Toasters are a kitchen staple, but nothing’s more frustrating than pressing down the lever and waiting—only to find your bread stays cold. A toaster that won’t heat is a common problem that can interrupt your morning routine or meal prep. Luckily, most issues are easy to diagnose and fix without calling a technician. Whether your toaster is old, new, or somewhere in between, this guide will help you troubleshoot and repair it step-by-step. Keep reading to learn practical tips, tools you’ll need, and common mistakes to avoid, so you can enjoy perfectly toasted bread again in no time.
Step-by-Step Guide to Fixing a Toaster That Won’t Heat
-
Unplug and Inspect the Power Source
Start by unplugging your toaster and checking the outlet. Try plugging in another small appliance to confirm the outlet works. A faulty outlet or loose plug connection is often the simplest cause of no heat. -
Clean Out Crumb Buildup
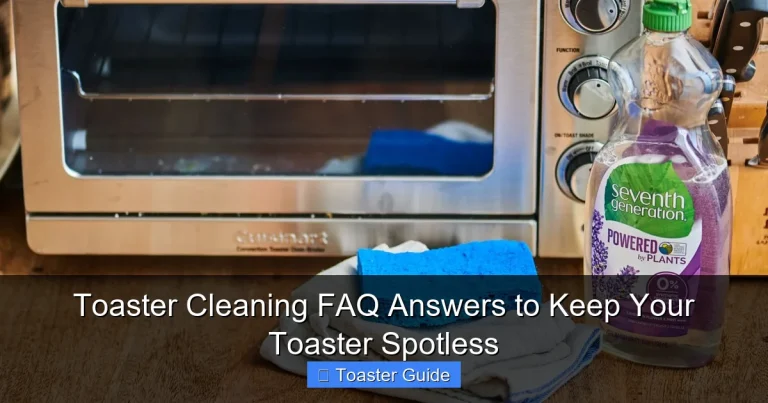
Crumbs trapped inside the toaster can block heating elements or cause shorts. Remove the crumb tray and gently shake out any debris. Use a soft brush or compressed air to clean hard-to-reach areas. -
Check the Heating Elements for Damage
Look inside the toaster slots to see if the heating wires glow when the toaster is on. If they’re broken or blackened, the elements may need replacement. Be careful when inspecting to avoid burns or electric shock. -
Test the Toaster’s Fuse or Thermal Cutoff
Many toasters have a fuse or thermal cutoff switch to prevent overheating. If your toaster isn’t heating at all, this component might have blown. Consult your toaster’s manual for fuse location and instructions on replacing it safely. -
Reset the Toaster (If Applicable)
Some models include a reset button or switch. After unplugging the toaster and cleaning it, press the reset button to restore normal function. Check your model’s manual for specific reset instructions, such as the Breville toaster user manual. -
Inspect the Lever and Internal Mechanism
The lever that lowers the bread and activates the heating circuit may be stuck or damaged. Make sure it moves freely and locks in place. If it feels loose or doesn’t trigger the toaster, it may need repair or replacement. -
Try a Different Toasting Setting
Sometimes the toaster’s thermostat or timer malfunctions, causing no heat. Test different browning settings to see if any produce heat. If only some settings work, the control dial might need adjustment or replacement. -
Consider Professional Repair or Replacement
If you’ve tried these steps and the toaster still won’t heat, it may have an internal electrical fault. For safety and cost reasons, it might be best to consult a professional or replace the toaster, especially if it’s older than five years.
Essential Lists for Fixing Your Toaster
Tools and Materials You’ll Need
- Screwdrivers (Phillips and flathead)
- Soft-bristled brush or compressed air can
- Multimeter (for electrical testing)
- Replacement fuses or thermal cutoffs (specific to your toaster model)
- Clean cloth
- Protective gloves
- Manual or troubleshooting guide for your toaster model
Common Mistakes to Avoid
- Trying to fix the toaster while it’s plugged in (risk of electric shock)
- Forcing parts open or using excessive force on the lever
- Ignoring crumb buildup, which can cause overheating or shorts
- Using water or liquids to clean inside the toaster
- Replacing parts without confirming compatibility with your model
- Skipping the power source check before opening the toaster
Pro Tips for Long-Term Toaster Health
- Regularly empty the crumb tray after every few uses to prevent buildup
- Use a soft brush or compressed air instead of water for cleaning
- Check the power cord for damage or wear periodically
- Refer to your toaster’s official support page like the Philips appliance support page for model-specific advice
- Store your toaster in a dry, clean spot to avoid moisture damage
- Consider investing in an Energy Star certified toaster to save on electricity (see Energy Star efficiency guidelines)
Understanding Toaster Issues: Causes and Solutions
| Common Cause | Symptoms | Easy Fix | When to Replace |
|---|---|---|---|
| Power outlet problem | Toaster won’t turn on or heat | Test outlet, use different socket | Never; outlet repair needed if faulty |
| Crumb buildup | Uneven heating or no heat | Clean crumb tray and interior | Rarely; clean regularly to prevent |
| Blown fuse/thermal cutoff | No heat, no power | Replace fuse per manual instructions | If fuse repeatedly blows, replace toaster |
| Broken heating elements | No heat, visible damage | Replace elements if possible | If elements unavailable or costly |
| Faulty lever or mechanism | Toaster won’t engage or heat | Repair or replace lever parts | If internal mechanism damaged |
Toaster Maintenance and Safety Guidelines
| Maintenance Task | Frequency | Purpose | Safety Tip |
|---|---|---|---|
| Empty crumb tray | Weekly or after heavy use | Prevents fire risk and ensures heating efficiency | Always unplug before cleaning |
| Inspect power cord | Monthly | Detects wear or damage that can cause shorts | Do not use if cord is frayed or damaged |
| Check heating elements | Every 6 months | Ensures elements glow evenly for consistent toasting | Use gloves and unplug to avoid burns |
| Reset toaster | As needed | Restores function after power interruptions or errors | Refer to manual for reset procedure |
| General cleaning | Monthly | Maintains hygiene and appliance longevity | Use dry cloths and brushes only |
Frequently Asked Questions
Why is my toaster not heating even though it’s plugged in?
If your toaster is plugged in but not heating, the problem might be the power outlet, a blown fuse, or an internal electrical issue. Start by testing the outlet with another appliance. If the outlet works, check the toaster’s fuse or thermal cutoff, which can blow to prevent overheating. Refer to your toaster’s manual for fuse replacement instructions, such as the Cuisinart toaster user manuals.
How do I safely clean my toaster to fix heating problems?
Unplug your toaster before cleaning. Remove the crumb tray and shake out crumbs into the trash. Use a soft brush or compressed air to clean inside the slots without touching heating elements. Avoid using water or liquids inside the toaster to prevent damage and electrical hazards. Regular cleaning helps maintain heating efficiency and reduces fire risk.
Can a faulty lever cause the toaster not to heat?
Yes, the lever activates the heating circuit by lowering the bread and triggering the thermostat. If the lever is stuck, loose, or broken, the toaster won’t heat. Check that the lever moves smoothly and locks in place. If damaged, the lever or internal mechanism may need repair or replacement.
How do I know if the heating elements are broken?
Heating elements are thin wires inside the toaster slots that glow red when heating. If they don’t glow or you see visible breaks or black spots, the elements are likely broken. Testing with a multimeter can confirm if they’re faulty. Broken elements usually require professional replacement or a new toaster.
Is it better to repair or replace a toaster that won’t heat?
For toasters older than five years or with multiple issues like broken elements and faulty wiring, replacement is often more cost-effective and safer. Simple fixes like cleaning crumbs, resetting, or replacing a fuse can extend a toaster’s life. Always prioritize safety—consult a professional if unsure.
What maintenance helps prevent heating issues in toasters?
Regularly empty the crumb tray, inspect the power cord for damage, and clean the toaster interior with a brush or compressed air. Avoid overloading the toaster with thick slices or frozen bread that strain the heating elements. Following manufacturer maintenance tips, like those found on the Philips appliance support page, can keep your toaster working efficiently longer.
Can resetting the toaster fix heating problems?
Some toasters have a reset button or feature that restores normal function after a fault or power surge. Unplug the toaster, press the reset button if available, and plug it back in. Refer to your toaster’s manual, such as the Breville toaster user manual, for exact reset instructions. This simple step can often fix heating issues without repairs.
Final Thoughts on Fixing a Toaster That Won’t Heat
When your toaster stops heating, it can feel like a small kitchen crisis. Fortunately, most problems are straightforward to diagnose and fix with a little patience and the right approach. Always start by checking power and cleaning crumb buildup—the simplest fixes often solve the issue. If you need to replace parts like fuses or heating elements, consult your model’s manual or official support pages for safe guidance. Remember, safety first: unplug before working on your toaster and avoid water inside the appliance. With regular maintenance and these practical tips, you’ll keep your toaster toasting perfectly for years to come. Don’t hesitate to replace older or damaged toasters to ensure reliable, safe operation every day.