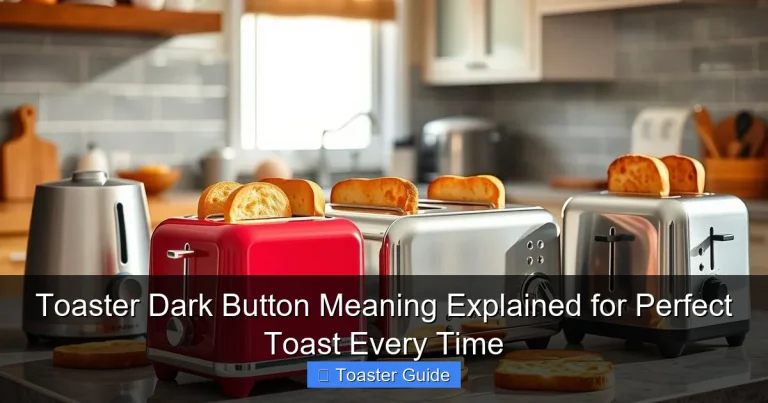
Toaster Burn In Before First Use: Must-Have Tips for Safe, Effortless Start
Toaster Burn In Before First Use: Must-Have Tips for Safe, Effortless Start
Quick Summary: To ensure a safe and smooth start, always perform a toaster burn-in before first use by running the toaster empty for a few cycles. This removes manufacturing residues and odors, prevents smoke, and guarantees better toast quality. Follow simple steps and safety tips for a hassle-free toaster experience right from day one.
Buying a new toaster is exciting, but many first-time users get caught off guard by the strange smell or slight smoke when using it for the first time. This common issue often leaves people worried about safety or the quality of their appliance. The good news? A quick “burn-in” process before your first use clears out factory residues and prepares your toaster to work perfectly. In this guide, I’ll walk you through every step of the toaster burn-in, share must-know tips, and show you how to avoid common pitfalls. By the end, you’ll feel confident starting your toaster safely and effortlessly.
What Is Toaster Burn In Before First Use and Why Is It Necessary?
When a toaster is manufactured, it often has leftover oils, coatings, and dust inside the heating elements or interior. These residues can emit a burnt smell or even smoke when heated for the first time. The “burn-in” process means running the toaster empty to burn off these residues safely before using it with food.
Here’s why it’s essential:
- Removes manufacturing residues: Oils and coatings from the factory can cause unpleasant odors or smoke.
- Improves toaster lifespan: Burning off residues prevents buildup that could damage heating elements.
- Ensures food safety: Prevents chemical residues from contaminating your toast.
- Enhances performance: A clean heating environment helps toast evenly and consistently.
Skipping this step can lead to unnecessary worry, wasted bread, and a less enjoyable kitchen experience. It’s a quick, easy process that sets the stage for years of reliable use.
Step-by-Step Guide: How to Perform a Toaster Burn In Before First Use
Ready to start? Follow these simple steps to complete a safe and effective toaster burn-in.
1. Read Your Toaster’s Manual
Before anything else, check your toaster’s user manual. Many brands like Breville toaster user manual or Cuisinart support pages include specific instructions or warnings about the initial burn-in. This ensures you follow manufacturer recommendations for your model.
2. Choose a Well-Ventilated Area
Place your toaster on a stable countertop near an open window or under a kitchen vent hood. The burn-in can produce a slight smoke or odor, so good ventilation helps keep your kitchen fresh and safe.
3. Clean the Exterior and Crumb Tray
Wipe the outside of your toaster with a damp cloth to remove any dust from shipping. Remove the crumb tray (if detachable) and clean it thoroughly. A clean crumb tray prevents leftover crumbs from burning during the process.
4. Run the Toaster Empty on a Medium Setting
- Plug in the toaster and set the browning control to medium.
- Run the toaster cycle without bread or any food inside.
- Repeat this 2 to 3 times to ensure all residues burn off.
During this time, you may notice some smoke or a burnt smell. This is normal and part of the cleaning process.
5. Let the Toaster Cool Completely
After the cycles, unplug the toaster and allow it to cool down. This prevents burns and helps stabilize the heating elements.
6. Wipe the Interior if Needed
If you see any residue or dust inside, gently wipe with a dry cloth or use a soft brush. Avoid using water inside the toaster as it can damage the electrical parts.
7. Perform a Final Test with Bread
Insert a slice of bread and toast on a medium setting. Check for even browning and absence of unusual smells. If all looks good, your toaster is ready for regular use!
Common Mistakes to Avoid During Toaster Burn In
- Burning with food inside: Don’t skip the empty cycles. Burning with bread inside can cause uneven toasting or flavor contamination.
- Ignoring ventilation: Always ensure good airflow to avoid smoke buildup or setting off smoke alarms.
- Using high heat settings initially: Start with medium heat to avoid excessive smoke and potential damage.
- Skipping crumb tray cleaning: Crumbs left inside can burn and create extra smoke or odors.
- Not unplugging after burn-in: Always unplug and let the toaster cool before handling or cleaning.
Pro Tips for a Smooth, Safe Toaster Start
- Use a timer: Keep track of cycles so you don’t overdo the burn-in.
- Test different settings: After burn-in, try various browning levels to find what suits your bread type best.
- Regular maintenance: Clean crumb trays weekly and wipe the exterior often to keep your toaster fresh.
- Energy efficiency: Look for models with Energy Star efficiency guidelines to save electricity without sacrificing performance.
- Safety first: Never leave the toaster unattended during burn-in or regular use.
How to Tell If Your Toaster Needs a Burn-In: Signs to Watch For
Not all toasters are created equal, and some might have better factory cleaning than others. Here are signs your toaster likely needs a burn-in:
- Strong chemical or plastic-like smell when first plugged in.
- Visible residue or dust inside the toaster slots.
- Smoke or light haze during the initial toasting cycles.
- Uneven heating or inconsistent browning during first uses.
If you notice any of these, performing the burn-in will improve safety and toast quality.
Cleaning and Maintaining Your Toaster After Burn-In
Keeping your toaster clean extends its life and keeps your toast tasting great. Here’s a simple maintenance routine:
- Empty crumb tray regularly: Do this at least once a week or more if you use your toaster daily.
- Wipe exterior weekly: Use a damp cloth and mild detergent if needed.
- Clean interior carefully: Use a soft brush to remove crumbs and dust inside slots.
- Check power cord and plug: Ensure no damage or fraying for electrical safety.
- Store properly: Keep your toaster in a dry, dust-free area when not in use.
Following these steps prevents buildup, reduces odors, and maintains optimal performance. For detailed cleaning tips, check your Philips appliance support page.
Table: Toaster Burn-In Checklist
| Step | Action | Why It Matters | Tip |
|---|---|---|---|
| 1 | Read User Manual | Follow model-specific instructions | Look for burn-in or safety notes |
| 2 | Ventilate Area | Prevents smoke buildup | Open window or turn on vent hood |
| 3 | Clean Exterior & Crumb Tray | Removes dust and crumbs | Use damp cloth; dry crumb tray thoroughly |
| 4 | Run Empty Cycles | Burns off factory residues | Set to medium heat; repeat 2-3 times |
| 5 | Cool Down | Prevents burns and stabilizes elements | Unplug and wait 10-15 minutes |
| 6 | Final Test with Bread | Ensures toaster works well | Use medium setting; check for odors or smoke |
Choosing Your First Toaster: What to Look For
Once your burn-in is complete, you’re ready to enjoy your toaster. If you’re still shopping, here are key features to consider:
- Slots size and number: Wide slots fit bagels and thick bread.
- Browning control: Multiple settings let you customize your toast.
- Crumb tray: Removable trays make cleaning easier.
- Auto shut-off: Safety feature to prevent burning.
- Brand reputation and warranty: Choose trusted brands like Breville or Cuisinart for reliability.
For detailed specs and model comparisons, visit official manufacturer sites like the Panasonic appliance support page.
Frequently Asked Questions About Toaster Burn In Before First Use
1. How long does the toaster burn-in process take?
Typically, the burn-in takes about 10 to 15 minutes. Running 2 to 3 empty cycles on a medium setting is usually sufficient to burn off residues and odors.
2. Is it safe to use the toaster without doing a burn-in?
While not always dangerous, skipping the burn-in can lead to unpleasant smells, smoke, and potential chemical residues affecting your food. It’s safer and better for your toaster’s longevity to perform the burn-in first.
3. Will my toaster always produce smoke during burn-in?
Some light smoke or odor is normal during the initial burn-in due to factory oils burning off. However, it should be minimal and dissipate quickly with proper ventilation.
4. Can I use water to clean the inside of my toaster?
Never use water inside the toaster slots or near heating elements. Use a dry cloth or soft brush to remove crumbs and dust safely.
5. How often should I clean my toaster after burn-in?
Clean the crumb tray weekly or more often if you use the toaster daily. Wipe the exterior regularly and remove crumbs from inside to prevent buildup and odors.
6. What if my toaster still smells after burn-in?
If odors persist after several burn-in cycles, double-check your cleaning steps and ventilation. Persistent strong smells could indicate a defect—contact the manufacturer or check the Breville toaster user manual or support for guidance.
7. Does the burn-in process waste energy?
The burn-in uses a small amount of electricity but is a one-time process that helps your toaster run more efficiently and safely over time, saving energy in the long run.
Conclusion
Starting your new toaster with a proper burn-in is a simple step that pays off in safety, performance, and peace of mind. By removing factory residues through empty heat cycles, you prevent smoke, odors, and potential damage. Remember to ventilate the area, clean the crumb tray, and follow your toaster’s manual for model-specific advice. With these must-have tips and practical steps, you’ll enjoy perfectly toasted bread from the very first slice. Keep your toaster clean and well-maintained, and it will be a reliable kitchen companion for years. Happy toasting!