How to Deglaze Instant Pot: A Simple Guide for Better Flavor and Fewer Burn Warnings

If you have ever browned meat or sautéed onions in your Instant Pot and then noticed stuck brown bits on the bottom, you have already met the reason deglazing matters. Learning how to deglaze Instant Pot is one of the easiest ways to improve flavor and avoid the frustrating “Burn” message.
Deglazing sounds like a chef term, but it is very simple. You add a small amount of thin liquid to the hot inner pot, then scrape up the browned bits stuck to the bottom. Those bits are full of flavor, and removing them helps the Instant Pot heat more evenly before pressure cooking.
In this guide, you will learn what deglazing means, when to do it, which liquids work best, how much liquid to use, how to avoid common mistakes, and when a stuck-on mess may mean your appliance needs support or replacement.
Quick Answer
To deglaze an Instant Pot, press Cancel after sautéing, add a small amount of thin liquid like broth, water, or wine, then scrape the bottom of the stainless steel inner pot with a wooden spoon or silicone spatula. Make sure no browned bits remain stuck before starting pressure cooking.
What Does Deglazing an Instant Pot Mean?
Deglazing means loosening the browned food stuck to the bottom of the pot after sautéing or browning. These browned bits are often called “fond.” They form when meat, onions, garlic, spices, or tomato paste cook against the hot stainless steel surface.
In a regular pan, fond adds deep flavor to sauces and gravies. In an Instant Pot, it does the same thing, but it also has another important job: it helps prevent scorching during pressure cooking.
The Instant Pot’s inner pot sits directly over the heating plate. If thick food or burnt bits stay stuck at the bottom, the cooker may sense overheating and stop the cooking cycle. That is when many home cooks see the dreaded Burn or Food Burn warning.
The official Instant Pot multi-cooker manuals also explain deglazing as adding liquid to the hot inner pot and loosening caramelized pieces from the bottom before continuing with pressure cooking or slow cooking.
Why Deglazing Matters Before Pressure Cooking
Deglazing is not just a flavor trick. It helps your Instant Pot work better.
When food is stuck to the bottom, the appliance may struggle to build pressure properly. The stuck layer can block liquid from moving around the pot. It may also make the bottom heat faster than the rest of the food.
Deglazing helps because it:
- Adds flavor from browned meat, vegetables, and spices
- Reduces the chance of a Burn warning
- Helps liquid reach the bottom of the pot
- Improves sauces, soups, stews, and braises
- Makes cleanup easier later
For example, if you are making beef stew, the brown bits after searing the beef are not waste. They are concentrated flavor. A splash of broth can lift them into the sauce and make the final dish taste richer.
When Should You Deglaze an Instant Pot?
You should deglaze any time you use the Sauté function before pressure cooking, especially if you see food stuck to the bottom.
Common times to deglaze include:
- After browning beef, pork, chicken, or sausage
- After cooking onions, garlic, or mushrooms
- After sautéing spices, curry paste, or tomato paste
- Before pressure cooking chili, stew, soup, or pasta sauce
- After a Burn warning, once it is safe to open the lid
- Before adding thick sauces or tomato products
You do not always need to deglaze if you only warmed oil briefly or cooked very watery vegetables. But if you see a brown, sticky, or dry layer on the bottom, deglaze before moving on.
Best Liquids for Deglazing an Instant Pot
The best deglazing liquid is thin enough to move freely across the bottom of the pot. The goal is to loosen stuck food, not add a thick sauce that burns again.
| Deglazing Liquid | Best For | Notes |
|---|---|---|
| Water | Any recipe | Simple, cheap, neutral flavor |
| Chicken broth | Chicken, rice, soups, stews | Adds savory flavor |
| Beef broth | Beef stew, pot roast, chili | Deepens meaty flavor |
| Vegetable broth | Beans, lentils, vegetables | Good all-purpose option |
| Wine | Beef, chicken, mushrooms, sauces | Use moderately and simmer briefly |
| Stock | Soups, braises, grains | Richer than broth |
| Apple juice or cider | Pork, ribs, autumn recipes | Adds sweetness |
| Soy sauce mixed with water | Asian-style dishes | Use diluted because it is salty |
Avoid using thick liquids as your only deglazing liquid. Tomato sauce, cream, gravy, barbecue sauce, and condensed soup are usually too thick to work well on their own.
Best choice for beginners: use broth. It gives better flavor than water and works in most savory recipes.
How Much Liquid Do You Need to Deglaze?
For deglazing only, you usually need ¼ to ½ cup of thin liquid. That is enough to cover the bottom and loosen the stuck bits.
However, pressure cooking also needs enough total liquid to create steam. Depending on your Instant Pot model and recipe, that amount may be more than the small splash used for deglazing. Always check your recipe and your model’s manual.
A helpful rule is:
- Use ¼ cup for a small amount of browning
- Use ½ cup for heavy browning or a large pot
- Use more if the recipe already needs extra liquid for pressure cooking
Do not confuse deglazing liquid with the total cooking liquid. Deglazing is one step. Pressure cooking still needs enough thin liquid to build steam.
How to Deglaze Instant Pot Step by Step
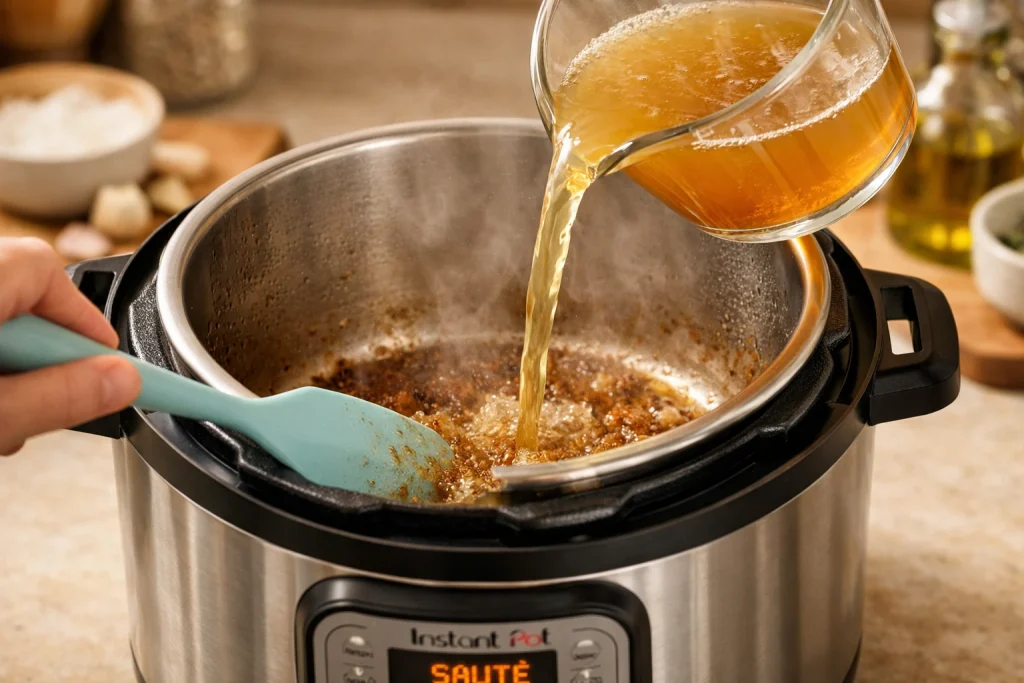
Follow these steps after using the Sauté function.
1. Press Cancel
After browning or sautéing, press Cancel. This stops the Sauté heat so the pot does not keep getting hotter while you scrape.
The inner pot will still be hot, which is good. Heat helps the liquid loosen the browned bits.
2. Remove Large Food Pieces if Needed
If large pieces of meat or vegetables are blocking the bottom, move them to a plate temporarily.
You do not need to remove every ingredient. But if you cannot clearly scrape the bottom, take the bulky items out first.
3. Add Thin Liquid
Pour in ¼ to ½ cup of broth, water, wine, or another thin liquid.
You should hear a gentle sizzle. That sound means the liquid is hitting the hot surface and loosening the browned layer.
Do not pour liquid into the cooker base. Only add liquid to the removable stainless steel inner pot.
4. Scrape the Bottom Gently
Use a wooden spoon or silicone spatula to scrape the bottom of the inner pot.
Move slowly across the whole surface, especially the center. Food often sticks most where the heating element is strongest.
Avoid metal tools if you want to protect the stainless steel surface from scratches.
5. Check for Stuck Bits
Tilt the pot slightly or move the food aside so you can see the bottom. It should look mostly smooth, with no thick burnt patches stuck to the surface.
A few tiny brown specks are fine. A rough, black, crusty layer is not.
6. Add the Rest of the Ingredients
Once the bottom is clean, add your remaining ingredients.
If you are using thick ingredients like tomato sauce, salsa, cream, or barbecue sauce, add them last and do not stir them deeply into the bottom unless the recipe says to. Keeping thick sauces on top can help reduce scorching.
7. Start Pressure Cooking
Lock the lid, set the steam release correctly for your model, and choose the cooking program.
Follow your recipe for cook time and pressure release method. For safety, read your model’s instructions because lid style, venting design, and minimum liquid needs can vary.
Expert Tip
Expert Tip: After deglazing, run your spoon across the bottom in a slow “X” shape. If the spoon glides smoothly without catching on stuck food, the pot is usually ready for pressure cooking.
How to Deglaze After a Burn Warning
If your Instant Pot shows a Burn or Food Burn message, do not panic. The appliance is warning you that something may be overheating at the bottom.
Here is what to do:
- Press Cancel.
- Let the pressure release safely if the pot has already sealed.
- Open the lid only when the float valve has dropped.
- Remove food carefully into a bowl.
- Check the bottom of the inner pot.
- Add thin liquid and scrape off the stuck layer.
- If the food is badly burnt, transfer the unburnt food to a clean inner pot before continuing.
Do not ignore a strong burnt smell. If the bottom layer is black and bitter, scraping it into the food may ruin the taste.
For food safety, do not leave cooked food sitting out for a long time while troubleshooting. The USDA explains that perishable food should not stay in the temperature danger zone for more than 2 hours, or more than 1 hour when the temperature is above 90°F.
Best Foods to Deglaze After Sautéing
Deglazing is especially useful for recipes that start with browning.
Good examples include:
- Pot roast
- Beef stew
- Chili
- Chicken curry
- Butter chicken
- Pulled pork
- Ribs
- Lentil soup
- Pasta sauce
- Mushroom risotto
- Jambalaya
- Taco meat
- Beans with sausage
These recipes often begin with oil, meat, onions, garlic, spices, or tomato paste. That combination creates flavor, but it can also stick.
Deglazing turns that stuck layer into part of the sauce.
What Not to Use for Deglazing
Some ingredients taste great but are not ideal for deglazing by themselves.
Avoid these as your only deglazing liquid:
- Heavy cream
- Milk
- Cheese sauce
- Tomato paste
- Thick tomato sauce
- Barbecue sauce
- Honey
- Syrup
- Teriyaki glaze
- Condensed soup
- Flour-thickened gravy
These ingredients can scorch because they are thick or sugary. You can still use them in many Instant Pot recipes, but add a thin liquid first and make sure the bottom is clean.
Then layer thicker ingredients on top when possible.
Safety Tips for Deglazing an Instant Pot
Deglazing is simple, but the pot is hot. Use care.
Keep these safety points in mind:
- Press Cancel before deglazing.
- Keep your face and hands away from steam.
- Use a long-handled spoon or spatula.
- Never deglaze inside the cooker base without the inner pot.
- Do not touch the heating plate.
- Do not use the pressure lid while Sauté is still active.
- Do not try to open the lid when the pot is pressurized.
The U.S. Fire Administration recommends unplugging small appliances when not in use, and that is a smart habit with countertop cookers too. Once cooking is finished and the appliance is cool, unplug it before cleaning or inspecting the base.
Cleaning After Deglazing
Deglazing often makes cleaning easier because it loosens food before it hardens.
After cooking:
- Let the inner pot cool.
- Wash it with warm, soapy water.
- Use a non-abrasive sponge.
- Soak stubborn spots with warm water and dish soap.
- Dry the pot before placing it back in the base.
For rainbow stains or cloudy marks on stainless steel, a little white vinegar can help. These marks are usually cosmetic and do not mean the pot is damaged.
Do not submerge the cooker base in water. The base contains electrical parts. Wipe it with a slightly damp cloth only when unplugged and cool.
Deglazing and the Burn Message: What Home Cooks Should Know
The Burn message does not always mean your food is ruined. It usually means the cooker senses too much heat at the bottom.
Deglazing helps prevent this because it removes stuck food before pressure cooking begins.
But deglazing is only one part of the solution. You may still get a Burn warning if:
- There is not enough thin liquid
- The sauce is too thick
- Tomato products are sitting on the bottom
- Rice or pasta absorbed the liquid too quickly
- The sealing ring is not fitted properly
- The steam release was not set correctly
- The inner pot is warped or not sitting flat
If you get Burn warnings often, pay attention to the pattern. One mistake is normal. Repeated warnings may mean a recipe issue, a damaged inner pot, or an appliance problem.
Cost, Quality, and Product-Choice Considerations
Deglazing does not require special equipment. A basic wooden spoon, silicone spatula, and broth are enough.
Still, a few simple choices can make cooking easier:
- Silicone spatula: Gentle on the pot and flexible enough to reach edges.
- Wooden spoon: Sturdy for scraping browned meat bits.
- Extra inner pot: Helpful if one pot is badly scorched or soaking.
- Glass lid: Useful for Sauté or Slow Cook mode, but not for pressure cooking.
- Higher-quality broth or stock: Adds better flavor than plain water.
If your stainless steel inner pot is scratched lightly, it can usually still work. But if it is warped, badly pitted, or no longer sits flat, replacement may be the better choice.
A replacement inner pot is usually much cheaper than replacing the whole appliance. But if the heating base has electrical issues, error codes, or damage, contact support instead of trying a DIY repair.
Common Mistakes Home Cooks Should Avoid
- Skipping deglazing after browning meat: This is one of the biggest causes of stuck food and Burn warnings.
- Using thick sauce instead of thin liquid: Tomato sauce or barbecue sauce can scorch if it sits directly on the bottom.
- Scraping with sharp metal tools: Metal can scratch the inner pot and make cleaning harder.
- Leaving the Sauté function on too long: The pot can get very hot and burn garlic, spices, or tomato paste quickly.
- Not checking the center of the pot: The middle often has the most stuck food.
- Adding dairy too early: Milk, cream, and cheese can separate or burn under pressure.
- Ignoring a burnt smell: If the bottom is black and bitter, do not scrape all of it into your food.
- Trying to repair electrical issues yourself: The cooker base is not a safe DIY repair project.
When to Contact Customer Support or Replace the Appliance
Deglazing can fix many cooking issues, but it cannot fix a damaged appliance.
Contact Instant Pot customer support or consider replacement if you notice:
- Burn warnings with plenty of thin liquid and a clean pot
- A warped inner pot that rocks or does not sit flat
- A damaged power cord
- Sparks, smoke, or electrical smell
- Repeated error codes
- A cracked lid, damaged valve, or broken sealing parts
- The cooker shuts off unexpectedly
- The heating base gets wet inside
The Consumer Product Safety Commission advises that if an appliance shocks you, trips a breaker, or repeatedly causes electrical problems, it should be unplugged and repaired or replaced.
Do not open the cooker base or attempt internal electrical repairs. That can create shock, fire, and pressure-cooking safety risks. If the appliance is under warranty, use manufacturer support first.
Deglazing for Different Recipes
For Beef Stew
Brown the beef in batches. Press Cancel. Add ½ cup beef broth and scrape the bottom well. Then add vegetables, seasoning, and the rest of the broth.
This gives the stew a richer flavor and helps prevent the browned beef bits from burning.
For Chicken Curry
After sautéing onions, garlic, ginger, and spices, add a splash of broth or water. Scrape the bottom before adding tomato puree, coconut milk, or cream.
This is important because spices can stick quickly on Sauté mode.
For Chili
After browning ground beef, drain extra grease if needed. Add broth or water and scrape the pot. Add beans and tomatoes after the bottom is clean.
For thicker chili, avoid stirring tomato paste directly against the bottom before pressure cooking.
For Pasta
Deglaze after sautéing meat or onions. Then add water or broth before adding pasta.
Make sure pasta is covered enough to cook, but avoid stirring thick sauce all the way to the bottom unless the recipe is designed for it.
Can You Deglaze With Wine in an Instant Pot?
Yes, wine can be used to deglaze an Instant Pot. It works well for beef, chicken, mushrooms, onions, and sauces.
Use a moderate amount, such as ¼ to ½ cup. After adding wine, let it bubble briefly on the hot surface so the sharp alcohol smell softens. Then scrape the bottom and continue with the recipe.
For family meals, broth is often the easiest choice because it is simple, affordable, and works with nearly everything.
Should You Deglaze Before Slow Cooking?
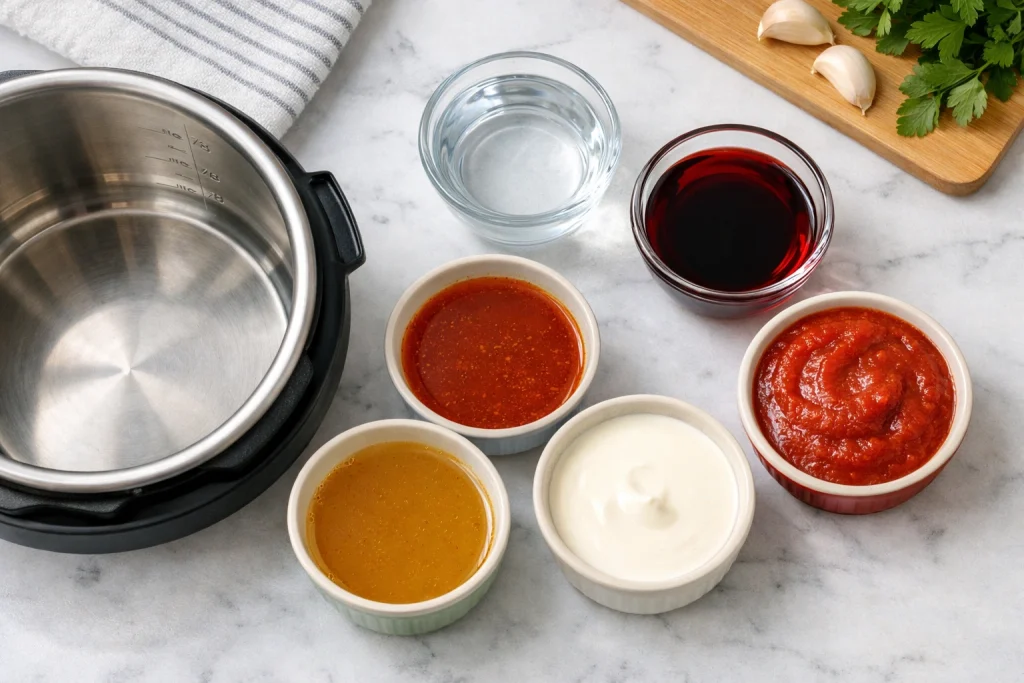
Yes, deglazing is also useful before using the Slow Cook function if you sautéed first.
Slow cooking does not use pressure, but stuck food can still affect flavor and cleanup. Deglazing before slow cooking helps turn browned bits into sauce instead of letting them dry onto the pot.
It is especially helpful for pot roast, pulled pork, meat sauce, and stews.
FAQs
Can I deglaze an Instant Pot with water?
Yes. Water works well for deglazing because it is thin and neutral. It will loosen stuck browned bits without changing the flavor much. For better taste, broth or stock is often a better choice.
Do I have to deglaze every time I use the Instant Pot?
No. You only need to deglaze when food is stuck to the bottom, usually after using Sauté. If you are simply pressure cooking soup or steaming food without browning first, deglazing may not be needed.
Why does my Instant Pot say Burn even after deglazing?
You may not have enough thin liquid, or thick ingredients may be sitting on the bottom. Tomato sauce, cream, starches, rice, and pasta can scorch if they are too thick or not layered correctly.
Can I use a metal spoon to deglaze my Instant Pot?
It is better to use a wooden spoon or silicone spatula. A metal spoon can scrape the stainless steel surface. Light scratches may not ruin the pot, but gentle tools are safer for long-term durability.
Should I turn off Sauté before deglazing?
Yes. Press Cancel before adding liquid. The pot will still be hot enough to deglaze, but turning off Sauté helps reduce burning and gives you better control.
Can I deglaze with vinegar?
Yes, but use vinegar carefully. A small splash can work for recipes that need acidity, such as pork or barbecue-style dishes. Too much vinegar can make the food taste sharp.
What if the bottom is black and badly burnt?
If the bottom layer is black, bitter, and stuck hard, remove the good food first. Clean the pot separately. Do not scrape a badly burnt layer into your recipe because it can ruin the flavor.
Conclusion
Learning how to deglaze Instant Pot is a small skill that makes a big difference. It helps you capture flavor, reduce Burn warnings, protect the quality of your food, and make cleanup easier.
The process is simple: press Cancel, add a thin liquid, scrape the bottom with a wooden or silicone tool, and make sure the inner pot feels smooth before pressure cooking. Use broth for extra flavor, water for a neutral option, and wine when it fits the recipe.
Most Instant Pot problems after sautéing come from stuck food, thick sauces, or not enough thin liquid. Deglazing solves many of those problems before they start.
Next time you brown meat, sauté onions, or cook spices in your Instant Pot, take one extra minute to deglaze. Your food will taste better, your pot will be easier to clean, and you can cook with more confidence.