How to Clean Toaster Without Taking Apart: Effortless & Must-Have Tips
Keeping your toaster clean is one of those kitchen tasks that often gets overlooked until crumbs pile up or burnt smells start to waft through the air. If you’re wondering how to clean toaster without taking apart the whole appliance, you’re in the right place. I’m Daniel Brooks, and I’ve spent years testing and using various kitchen gadgets, especially toasters and toaster ovens. I’m here to guide you through simple, practical methods that keep your toaster crumb-free and working efficiently, without the hassle of disassembling it.
Why Cleaning Your Toaster Matters
A clean toaster isn’t just about aesthetics. Over time, crumbs and food debris accumulate inside the toaster’s slots and crumb tray, which can cause uneven toasting, unpleasant odors, and even fire hazards. Regular cleaning also extends the life of your appliance by preventing buildup that can interfere with its heating elements.
Many people shy away from cleaning their toasters because they think it involves complicated disassembly or special tools. The good news is, you can maintain your toaster’s cleanliness with minimal effort and no need to take it apart. Let’s explore some easy, effective ways to do just that.
Basic Tools You’ll Need
Before diving into the cleaning steps, gather a few household items that make the process straightforward:
– A soft-bristled brush or pastry brush
– A microfiber cloth or sponge
– Mild dish soap
– A small handheld vacuum or a vacuum with a narrow nozzle
– Cotton swabs or toothpicks for tight spots
– White vinegar or baking soda (optional for stubborn stains)
Having these on hand will make cleaning quick and effective without damaging your appliance.
Step-by-Step Guide: How to Clean Toaster Without Taking Apart
1. Unplug and Cool Down
Safety first. Always unplug your toaster and let it cool completely before cleaning. This prevents any risk of electrical shock or burns.
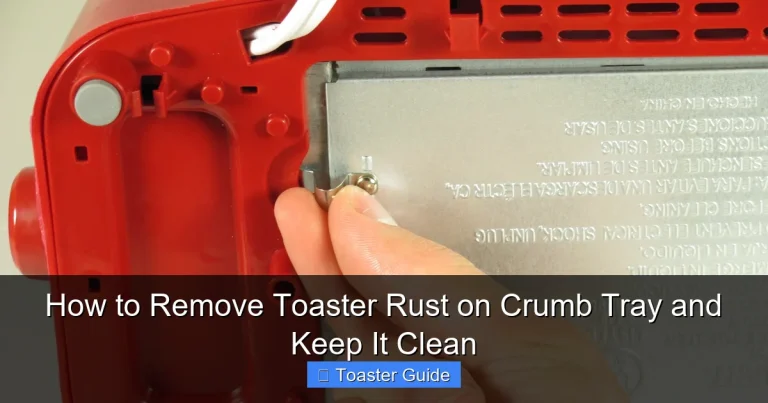
2. Empty the Crumb Tray
Most toasters have a removable crumb tray at the bottom or side. Slide this out gently and dump the crumbs into the trash. If your model doesn’t have a tray, turn the toaster upside down over a sink or garbage can and gently shake or tap it to dislodge crumbs.
For detailed info, check the Breville toaster user manual for your model’s specific crumb tray removal instructions.
3. Vacuum Loose Crumbs
Use a handheld vacuum or a vacuum cleaner with a narrow attachment to suck up crumbs inside the slots and around the crumb tray area. This step helps reach crumbs that shaking alone can’t get rid of.
4. Brush the Interior Gently
Take a soft-bristled brush or pastry brush and carefully sweep inside the toaster slots to loosen stuck crumbs and debris. Avoid using anything metal or abrasive to prevent damaging the heating elements.
5. Wipe the Exterior
Dampen a microfiber cloth or sponge with warm water and a drop of mild dish soap. Wipe down the toaster’s exterior surfaces, including knobs and buttons. Avoid letting water seep into the slots or electrical components.
For tough greasy spots, a mixture of white vinegar and water works wonders. You can find safe cleaning tips on the Philips appliance support page.
6. Clean the Crumb Tray Thoroughly
Wash the crumb tray in warm, soapy water, then dry it completely before reinserting. This step prevents lingering odors and mold growth.
7. Use Toothpicks or Cotton Swabs for Stubborn Spots
If crumbs or stains remain in tight corners or crevices, use toothpicks or cotton swabs dipped lightly in soapy water to clean these spots carefully.
8. Optional Deep Cleaning: Baking Soda Paste
For persistent stains or burnt-on residue, make a paste using baking soda and water. Apply it gently to the affected areas, let it sit for 10 minutes, then wipe clean with a damp cloth. This method is safe and natural.
Tips for Maintaining a Clean Toaster
– Empty the crumb tray weekly or more frequently if you use your toaster daily.
– Avoid dropping large pieces of bread or food inside the slots.
– Use toaster bags for toasting items like sandwiches to minimize mess.
– Regularly wipe down the exterior to prevent grease buildup.
– Never submerge the toaster in water or use harsh chemicals.
Following these habits saves you time and keeps your toaster functioning well.
Common Misconceptions About Cleaning Toasters
Some people think that to clean a toaster properly, you must unscrew and take it apart. This isn’t necessary for routine maintenance and can void your warranty or damage sensitive components. The cleaning methods outlined here are safe, effective, and recommended by major appliance manufacturers.
Others worry about damaging the heating elements. Using soft brushes and avoiding metal tools ensures you won’t harm these delicate parts.
Energy Efficiency and Toaster Maintenance
A clean toaster not only performs better but also uses energy more efficiently. Crumbs and residue can cause uneven heating, making your toaster work harder and longer. Following energy-saving guidelines from Energy Star efficiency guidelines can help you choose and maintain appliances that reduce your electricity bill.
How Often Should You Clean Your Toaster?
The frequency depends on usage. For most households, a monthly crumb tray cleaning and a weekly exterior wipe are sufficient. For busy kitchens or if you toast frequently, consider more frequent cleaning to avoid buildup.
What to Avoid When Cleaning Your Toaster
– Avoid spraying water or cleaner directly into the toaster slots.
– Don’t use metal utensils to scrape crumbs or residue.
– Never immerse the toaster in water.
– Avoid abrasive pads or harsh chemicals that can damage the finish.
Sticking to gentle, dry, or slightly damp cleaning methods is the safest approach.
Additional Resources for Toaster Care
If you want to dive deeper or need model-specific advice, manufacturer websites provide excellent resources. For example, the Cuisinart toaster user guide offers detailed cleaning and maintenance tips. Likewise, Panasonic’s support pages have useful FAQs and troubleshooting advice for their toaster ovens.
FAQ: Quick Answers to Your Toaster Cleaning Questions
How do I clean crumbs from a toaster without taking it apart?
Unplug the toaster, remove and empty the crumb tray, shake out crumbs, vacuum inside, and brush gently with a soft brush.
Can I use water to clean my toaster?
Only use a damp cloth for the exterior. Avoid getting water inside the toaster slots or electrical parts.
What should I do if my toaster smells burnt?
Clean out all crumbs and residue thoroughly. If the smell persists, check for stuck food particles or consult your appliance’s manual.
How often should I clean the crumb tray?
At least once a week for frequent use or monthly for occasional use.
Is it safe to use baking soda to clean a toaster?
Yes, a mild baking soda paste is safe for removing stubborn stains without harming the appliance.
Can I use a vacuum cleaner to clean inside the toaster?
Yes, use a handheld vacuum with a narrow nozzle to remove crumbs safely.
What if my toaster doesn’t have a removable crumb tray?
Turn it upside down and gently shake to remove crumbs, then vacuum and brush inside carefully.
—
Keeping your toaster clean doesn’t have to be a chore or a technical challenge. With simple tools and a little routine care, you can enjoy perfectly toasted bread every day without worrying about crumbs, smells, or appliance damage. For more detailed cleaning instructions, always refer to your model’s official guide, like the Breville toaster user manual. A clean toaster is a happy toaster—and it makes your kitchen runs smoother and more enjoyable.