Sushi Rice in Rice Cooker Water Ratio Perfect Every Time
Start with about 1 cup sushi rice to 1 cup water in a rice cooker, then adjust slightly based on the rice and cooker. Rinse well, soak briefly, and let the rice rest before fluffing for the best texture.
If you want sushi rice that turns out fluffy, sticky, and easy to shape, the water ratio matters more than guesswork. In 2026, the simplest path is still the most reliable: measure carefully, rinse well, and let the rice cooker do the work.
- Start point: Use about a 1:1 rice-to-water ratio for short-grain sushi rice.
- Texture control: Rinse and soak to improve stickiness without making the rice mushy.
- Adjustment rule: Add or remove only small amounts of water between batches.
- Cooker tip: Follow your rice cooker lines or cup system consistently.
Why the Sushi Rice in Rice Cooker Water Ratio Matters in 2026
Search intent: getting fluffy, sticky sushi rice without guesswork
Most people searching for a sushi rice in rice cooker water ratio want one thing: a dependable starting point that works at home. They do not want dry grains, gluey mush, or a batch that falls apart before rolling.
A rice cooker helps remove a lot of uncertainty, but it does not remove the need for the right ratio. The correct amount of water still depends on the rice type, how much you rinsed it, and how your cooker handles moisture.
How the right ratio affects texture, flavor, and sushi-making results
Sushi rice should be tender, slightly sticky, and still separate enough to hold shape. Too much water gives a heavy, soft texture that can taste flat, while too little water leaves the grains firm and brittle.
The ratio also affects how well the seasoning absorbs later. If the rice starts out balanced, vinegar, sugar, and salt blend more evenly, which improves both flavor and texture for sushi bowls, rolls, and hand-formed rice.
Best Rice Cooker Water Ratio for Sushi Rice: The Simple Starting Point
Standard ratio for short-grain sushi rice in a rice cooker
A practical starting point for short-grain sushi rice is about 1 cup rice to 1 cup water by volume in many rice cookers, with small adjustments based on the brand and rice age. Some cooks prefer slightly less water, around 1 cup rice to 7/8 cup water, for a firmer finish.
If you are new to sushi rice, start with the cooker’s white rice line or a 1:1 baseline, then adjust in small steps. A difference of just a few tablespoons can change the final texture noticeably.
How rice cooker lines differ from measuring-cup ratios
Rice cooker inner pot lines are not always the same as standard kitchen measuring cups. The cup that comes with a rice cooker is often smaller than a U.S. cup, so mixing cup systems can throw off the result.
For best consistency, use one measuring system from start to finish. If you use the cooker cup for rice, use it for water too, unless the manufacturer gives a clear line-based instruction.
When to adjust for brand, grain age, and rice type
Older rice often needs a little more water because it has dried out in storage. Fresher rice may need slightly less, especially if it was stored well and still has good moisture balance.
Different brands also absorb water differently. Even within short-grain rice, one bag may cook softer than another, so treat the first batch as a test batch and fine-tune from there.
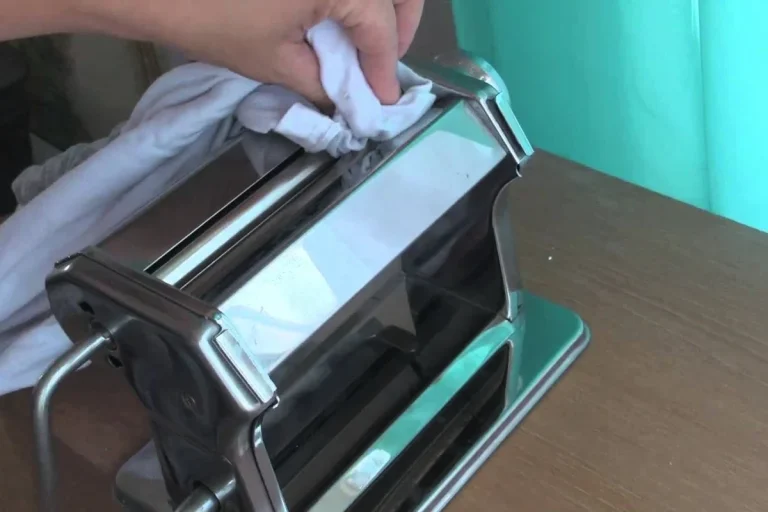
Step-by-Step Method for Perfect Sushi Rice in a Rice Cooker
Rinsing until the water runs nearly clear
Rinsing removes excess surface starch, which helps prevent gummy rice. Swirl the rice gently in cool water, drain, and repeat until the water is much clearer, though it does not need to be perfectly clear.
Do not scrub the grains hard. Gentle rinsing protects the shape of the rice and helps the cooker produce a cleaner, more defined texture.
Soaking time before cooking and why it helps
Soaking gives the grains time to absorb water evenly before heat starts. For sushi rice, a soak of about 20 to 30 minutes is a useful general range, especially if your cooker does not have a dedicated sushi setting.
This step helps the center of the grain cook at the same pace as the outside. It can improve texture more than adding extra water ever will.
Measuring rice and water accurately
Use level measurements, not heaping ones. Even a small overfill can push the batch from balanced to overly soft, especially in smaller rice cooker pots.
Measure rice and water with the same cup system every time so your results stay consistent from batch to batch.
If your cooker has inside markings, fill to the correct line after adding rinsed rice. If you are using a separate measuring cup, add the exact measured water amount instead of estimating by sight.
Cooking, resting, and fluffing without crushing the grains
Once the cooker starts, let it finish the cycle without opening the lid. When it switches off, rest the rice for about 10 to 15 minutes so the steam can finish distributing through the pot.
Fluff gently with a rice paddle or silicone spatula. Use a cutting and folding motion rather than stirring aggressively, which can crush the grains and make the rice sticky in the wrong way.
How to Adjust the Ratio for Different Rice Cookers and Rice Types
Basic rice cookers vs. fuzzy logic and induction models
Basic rice cookers usually need the most careful measurement because they rely on simple heat and steam timing. Fuzzy logic and induction models often handle small variations better, but they still work best when you start with the right ratio.
If your cooker has a sushi setting, use it as a starting point rather than a guarantee. The setting may improve consistency, but the rice type and rinse level still matter.
Using sushi rice, short-grain white rice, and medium-grain alternatives
True sushi rice is usually short-grain and gives the classic sticky-but-soft texture. Short-grain white rice is usually the closest substitute, while some medium-grain rice can work in a pinch if it cooks to a similar texture.
Long-grain rice is not a good substitute for sushi-style results. It stays too separate and dry, which makes shaping and rolling much harder.
Rice cooker performance may vary by brand, model, and batch size, so a small first-batch adjustment is normal.
Adjustments for older rice, humid climates, and larger batches
Older rice often benefits from a little extra water, while rice stored in a humid kitchen may need slightly less. Large batches can also cook unevenly if the pot is packed too full.
If you are cooking more than usual, stay within the cooker’s maximum fill line and expect to test the texture once before serving. A small adjustment on the next batch is safer than overcorrecting too much on the first try.
Common Mistakes That Ruin Sushi Rice Texture
Too much water: mushy, overly soft rice
Too much water is one of the fastest ways to lose the clean sushi rice texture. The grains swell too far, stick together heavily, and can become hard to shape.
If this happens often, reduce the water by a few tablespoons at a time. Small changes are better than making a big jump.
Too little water: dry, undercooked, or brittle grains
Not enough water leaves the center of the grain undercooked. The rice may look done on top but feel firm or even brittle when you bite into it.
Dry rice can also break apart when mixed with seasoning. If your batches keep coming out dry, add a little more water or extend the soak time before cooking.
Skipping rinse and soak steps
Skipping the rinse leaves extra starch on the surface, which can make the rice heavy and gummy. Skipping the soak can leave the grain center underhydrated, especially in basic cookers.
These two steps are simple, but they do a lot of the work. They are often the difference between acceptable rice and rice that feels restaurant-quality at home.
Opening the lid too early or stirring at the wrong time
Opening the lid during cooking lets steam escape and can disrupt the final texture. Stirring too soon can break delicate grains before they finish setting.
Wait until the cooker finishes and the rice has rested. Then fluff gently and season while the rice is still warm, not hot enough to steam violently.
Timing, Cost, and Convenience Compared with Stovetop Sushi Rice
Rice cooker prep time versus stovetop monitoring
A rice cooker usually wins on convenience because it reduces active monitoring. Once the rice is measured, rinsed, soaked, and started, you can focus on the rest of the meal.
Stovetop rice can be excellent, but it usually demands more attention. You need to watch heat levels, listen for simmer changes, and manage the pot carefully to avoid scorching or uneven cooking.
Energy use and cleanup comparison
Rice cookers are often efficient for small to medium home batches because they are designed for one task and usually shut off automatically. Cleanup is also simpler because the rice cooks in a removable inner pot.
Stovetop cleanup may involve a pan, lid, boil-over mess, and more monitoring-related splatter. Exact energy use varies by appliance, batch size, and cooking time, but the rice cooker is usually easier to manage.
Why a rice cooker is often the most reliable option for home sushi rice
For most home cooks, the rice cooker provides the most repeatable results with the least stress. It is especially useful if you make sushi rice regularly and want a process you can trust.
The key is not just the machine. The best results come from a solid ratio, careful rinsing, and consistent measuring every time.
Safety and Practical Kitchen Notes for Better Results
Preventing overflow, steam burns, and lid mishandling
Do not overfill the inner pot, especially if the cooker foams a little during the cycle. Overflow can make a mess and may affect how the cooker vents steam.
Be careful when lifting the lid after cooking. Hot steam can burn your hands and face, so open it away from you and keep children back from the cooker during the release.
Using the right measuring cup and keeping the inner pot level
Use the measuring cup that matches your method, and keep the cooker on a flat, stable surface. A tilted pot can change the effective water level and lead to uneven cooking.
If the cooker sits on an uneven counter, move it before starting. Small setup details can make a real difference in texture.
Never force a lid, steam vent, or locking mechanism. If the cooker seems damaged or the seal is not working properly, stop using it and check the manufacturer’s guidance.
Food safety basics for cooling and storing cooked sushi rice
Sushi rice is best handled promptly after cooking and seasoning. If you are not serving it right away, keep it covered and avoid leaving it out for long periods at room temperature.
For storage, follow safe cooling practices and refrigerate leftovers as soon as practical. Reheat gently if needed, and do not leave cooked rice sitting out for extended periods.
Final Recap: The Easiest Way to Get Sushi Rice in a Rice Cooker Water Ratio Perfect Every Time
Quick summary of the ideal ratio, process, and adjustments
The best sushi rice in rice cooker water ratio usually starts around 1:1 for short-grain sushi rice, with small adjustments based on the rice and cooker. Rinse well, soak briefly, measure carefully, and let the rice rest after cooking before fluffing.
If the rice is too soft, use slightly less water next time. If it is too firm, add a little more water or extend the soak before cooking.
Final takeaway from the RedKitchenProject Editorial Team
The most reliable sushi rice is not about one magic number. It is about a consistent method that respects the rice, the cooker, and the small differences between brands and batches.
At RedKitchenProject, our editorial advice is simple: start with a dependable ratio, make small adjustments, and keep your measuring process consistent. That is the easiest way to get sushi rice that turns out right in 2026 and beyond.
Frequently Asked Questions
A common starting point is about 1 cup sushi rice to 1 cup water in a rice cooker. Some cooks prefer slightly less water for a firmer texture, then adjust in small steps.
Yes, rinsing helps remove excess surface starch and improves texture. Rinse until the water is much clearer, then drain well before cooking.
A short soak of about 20 to 30 minutes often helps the grains cook more evenly. It is especially useful if your cooker does not have a sushi setting.
Mushy rice usually means there was too much water or too much residual rinse water. Dry rice usually means too little water, not enough soak time, or an underperforming cooker setting.
Yes, short-grain white rice is usually the closest substitute and can work well. Medium-grain rice may also work, but long-grain rice is not ideal for sushi texture.
Let the rice rest briefly, then open the lid away from your face to avoid steam burns. Cool and store leftovers promptly, following safe food handling practices.