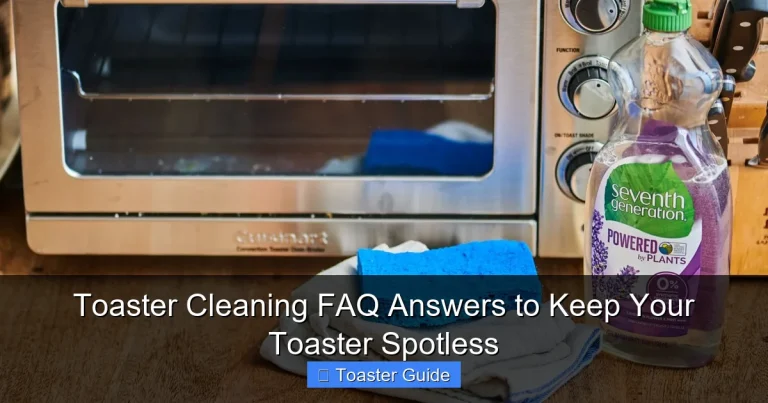
Toaster Crumbs Stuck Inside? Easy and Effortless Cleaning Tips

Toaster Crumbs Stuck Inside? Easy and Effortless Cleaning Tips
Quick Summary: If you have toaster crumbs stuck inside, the best way to clean them is to unplug the toaster, remove the crumb tray, and gently shake or vacuum out the crumbs. For stubborn bits, use a soft brush or compressed air. Regular cleaning prevents fires, keeps your toaster working well, and saves you time and hassle.
Toasters are kitchen staples, but crumbs stuck inside can be a real headache. These tiny bits of bread can build up over time, causing smoke, unpleasant odors, and even fire hazards. It’s a common problem, especially if you use your toaster daily or don’t clean it often. Luckily, cleaning toaster crumbs stuck inside is easier than you might think. With simple tools and a bit of elbow grease, you can have your toaster crumb-free in no time. This guide will walk you through easy, practical steps to get your toaster sparkling clean and working like new.
Why Are Toaster Crumbs a Problem?
Crumbs stuck inside your toaster are more than just messy—they can affect safety and performance. When crumbs accumulate, they can burn during toasting, causing smoke or even small fires. This not only smells bad but can damage your toaster over time. Plus, a clogged toaster heats unevenly, leading to unevenly toasted bread. Keeping your toaster crumb-free ensures better toast, safer kitchen use, and extends the life of your appliance.
Regular cleaning isn’t just about looks—it’s about keeping your kitchen safe and your toaster efficient. The good news is, you don’t need special tools or professional help. A few simple steps with everyday items can make a big difference.
Tools and Supplies You’ll Need
Before you start cleaning, gather these basic tools. Most are common household items:
- Soft brush (like a pastry brush or small paintbrush)
- Crumb tray (usually included with your toaster)
- Vacuum cleaner with hose attachment (optional but helpful)
- Compressed air canister (optional for stubborn crumbs)
- Microfiber cloth or soft rag
- Dish soap and warm water
- Toothpick or wooden skewer (for tight spots)
Having these ready will make the process smooth and quick. Avoid using metal utensils or sharp objects inside the toaster—they can damage heating elements or wiring.
Step-by-Step Guide to Cleaning Toaster Crumbs Stuck Inside
Step 1: Unplug Your Toaster
Safety first. Always unplug your toaster before cleaning to avoid electric shocks or damage. Never immerse your toaster in water or use water directly inside it.
Step 2: Remove and Empty the Crumb Tray
Most toasters have a removable crumb tray at the bottom or side. Pull it out gently and empty the crumbs into the trash. Wash the tray with warm, soapy water and dry it thoroughly before putting it back. This step removes the bulk of loose crumbs.
Step 3: Shake Out Loose Crumbs
Turn your toaster upside down over the sink or trash can and gently shake it to dislodge crumbs stuck inside. Tap lightly on the sides to loosen crumbs from hard-to-reach areas. Be careful not to shake too hard to avoid damaging internal parts.
Step 4: Use a Soft Brush to Sweep Inside
Use a soft brush to sweep crumbs out through the slots. A pastry brush or small paintbrush works well. Brush gently around the heating elements and walls to avoid bending or breaking any parts.
Step 5: Vacuum or Blow Out Stubborn Crumbs
If crumbs still linger, use a vacuum cleaner with a hose attachment to suck them out. Alternatively, a can of compressed air can blow crumbs free. Hold the toaster over a trash can during this step to catch dislodged crumbs.
Step 6: Clean the Exterior
Wipe the toaster’s outside with a damp microfiber cloth and mild dish soap if needed. Avoid abrasive cleaners that can scratch the surface. Dry thoroughly with a soft towel.
Step 7: Reassemble and Test
Once everything is clean and dry, reinsert the crumb tray and plug your toaster back in. Run a test toast with a scrap piece of bread to ensure it’s working properly and no crumbs remain.
Common Mistakes to Avoid When Cleaning Your Toaster
- Don’t use metal tools inside the toaster. They can damage heating elements or cause electrical shorts.
- Never submerge your toaster in water. This can ruin the appliance and create a safety hazard.
- Don’t forget to unplug the toaster. It’s essential for your safety.
- Don’t rush the drying process. Moisture inside the toaster can cause rust or electrical problems.
- Avoid excessive shaking. Too much force might break internal components.
Pro Tips for Keeping Your Toaster Crumb-Free Longer
- Clean your toaster every 1-2 weeks if you use it daily. This prevents buildup and keeps it safe.
- Use the crumb tray regularly. Empty it after every few uses to avoid overflow.
- Toast on lower settings if possible. High heat burns crumbs faster and creates more debris.
- Consider a toaster cover. It keeps dust and crumbs from settling inside when not in use.
- Inspect the toaster regularly. Look for stuck crumbs or signs of burning to catch problems early.
Pros and Cons of Different Toaster Cleaning Methods
| Cleaning Method | Pros | Cons |
|---|---|---|
| Removing and washing crumb tray | Easy, effective, removes most crumbs | Some toasters have small or non-removable trays |
| Shaking and tapping toaster | Quick, no special tools needed | Can miss stubborn crumbs, risk of damage if too rough |
| Using soft brush | Gentle, reaches tight spots | Requires patience, may not remove all crumbs |
| Vacuuming inside | Effective for deep cleaning | Needs vacuum with hose, careful not to damage parts |
| Compressed air | Blows out stubborn crumbs quickly | Can be messy, needs careful handling |
How to Prevent Toaster Crumbs from Getting Stuck Inside
Prevention is easier than deep cleaning. Here are some easy ways to keep crumbs from piling up inside your toaster:
- Use bread that’s not overly dry or crumbly. Fresher bread produces fewer crumbs.
- Toast smaller slices or halves. They produce less debris and fit better in slots.
- Wipe your bread before toasting. Remove loose crumbs from bread surface.
- Store your toaster in a clean, dry place. Dust and dirt can add to crumb buildup.
- Empty crumb tray regularly. Don’t wait for it to overflow.
Following these tips can significantly reduce the frequency of deep cleanings.
When to Consider Professional Repair or Replacement
If your toaster still smokes, sparks, or doesn’t toast evenly after cleaning, it might have internal damage or electrical issues. Signs you should contact a professional or replace your toaster include:
- Burning smells or smoke even after cleaning
- Heating elements not glowing or working properly
- Electrical sparks or unusual noises
- Broken crumb tray or slots
- Repeated toasting failures or uneven browning
Repair costs can sometimes approach the price of a new toaster, so check the Breville toaster user manual or manufacturer support pages for troubleshooting tips. If your toaster is old or extensively damaged, replacement might be safer and more cost-effective.
Additional Resources for Toaster Care
For detailed maintenance and safety tips, check official manufacturer instructions. Brands like Cuisinart appliance support page provide helpful guides. Also, see Philips appliance support page for cleaning advice specific to their models. For energy-efficient and safe kitchen appliances, review Energy Star efficiency guidelines. For food safety around toasters, the FDA food safety recommendations are useful.
Frequently Asked Questions (FAQ)
1. How often should I clean crumbs from my toaster?
For regular use, cleaning your toaster every 1-2 weeks is ideal. If you use it less often, clean it at least once a month. Frequent cleaning prevents buildup, reduces fire risk, and keeps your toaster working efficiently.
2. Can I use water to clean inside the toaster?
No, never put water inside your toaster or submerge it in water. Water can damage electrical components and cause safety hazards. Use dry methods like brushing, shaking, or vacuuming crumbs out instead.
3. What should I do if my toaster smells like burning?
Unplug the toaster immediately. Clean out all crumbs using the steps above. If the smell persists after cleaning, stop using the toaster and check the manufacturer’s troubleshooting guide or consider professional repair or replacement.
4. Is it safe to use compressed air inside my toaster?
Yes, compressed air can be effective for loosening crumbs in hard-to-reach areas. Use it carefully over a trash can to avoid mess. Avoid directing air at heating elements directly to prevent damage.
5. How can I prevent crumbs from getting stuck in my toaster?
Use fresh bread, wipe off loose crumbs before toasting, toast smaller slices, and empty the crumb tray regularly. Keeping your toaster covered when not in use also helps reduce crumb buildup.
6. Can stuck crumbs cause my toaster to malfunction?
Yes, excessive crumbs can cause uneven heating, smoke, and potentially damage the toaster’s electrical parts. Regular cleaning ensures smooth operation and extends your toaster’s lifespan.
7. What do I do if my toaster’s crumb tray is missing?
Check your toaster’s manual or manufacturer website for a replacement crumb tray. If unavailable, cleaning by shaking and vacuuming becomes more important. Consider contacting the manufacturer’s support page for specific advice.
Conclusion
Dealing with toaster crumbs stuck inside doesn’t have to be a frustrating chore. With simple tools, a bit of patience, and the right technique, you can keep your toaster clean, safe, and working perfectly. Regular maintenance prevents fire hazards, improves toast quality, and extends the life of your appliance. Remember to unplug before cleaning, use gentle tools, and empty the crumb tray often. By following these easy, practical tips, you’ll enjoy hassle-free mornings with perfectly toasted bread every time. For more detailed guidance or troubleshooting, always refer to your toaster’s official manual or manufacturer support pages to ensure you’re caring for your specific model correctly.