Why Toaster Bread Gets Stuck and How to Fix It Quickly
Why Your Toaster Bread Gets Stuck and How to Fix It Easily
If your toaster bread gets stuck, it’s usually due to crumbs buildup, improper bread size, or a faulty toaster mechanism. To fix this, unplug the toaster, gently remove the bread with a non-metal tool, clean the crumb tray regularly, and choose the right bread size. Proper care prevents jams and keeps your toaster working smoothly.
Getting your bread stuck in the toaster is a common kitchen nuisance that interrupts your morning routine. It can be frustrating when you’re in a hurry and the toast won’t pop up or pulls half inside, risking burns or damage to your appliance. But don’t worry — this issue happens to many home cooks and is usually easy to fix. With a few simple steps, you can safely remove stuck bread and prevent it from happening again. This guide will walk you through practical tips, maintenance tricks, and buying advice so your toaster works smoothly every day.
Why Does Toaster Bread Get Stuck?
Understanding why bread gets stuck helps you avoid the problem in the future. Here are the most common reasons:
- Crumbs Buildup: Over time, tiny bread crumbs accumulate inside the toaster. These crumbs can jam the mechanical parts or cause the bread to snag.
- Improper Bread Size or Shape: Thick, uneven, or oversized bread slices can get caught between the toaster’s heating elements or guides.
- Moisture in the Bread: Wet or very fresh bread is softer and more likely to stick or compress inside the toaster slots.
- Faulty Eject Mechanism: If the toaster’s spring or heating coil is damaged or worn out, it might not push the bread up properly.
- Misalignment of Toaster Slots: Physical damage or manufacturing defects can cause slots to be uneven or too narrow.
Most of these issues are easy to fix with routine care and proper usage. Knowing the root cause gives you a better chance at finding the right solution.
Step-by-Step Guide: How to Remove Stuck Bread Safely
When toast gets stuck, the first instinct might be to yank or force it out, but that can damage your toaster or cause injury. Follow these safe, beginner-friendly steps:
- Unplug the Toaster: Always disconnect your toaster from the power source before attempting to remove stuck bread to avoid electric shock.
- Let the Toaster Cool Down: If you were toasting just before, wait a few minutes for it to cool so you don’t burn your fingers.
- Use a Non-Metal Tool: Gently try to nudge or lift the bread with a wooden or plastic utensil like a chopstick or a pair of tongs. Avoid metal tools that can damage heating elements or cause electrical hazards.
- Turn the Toaster Upside Down: Hold the toaster over a trash bin or sink and gently shake it to dislodge crumbs or stuck bread pieces.
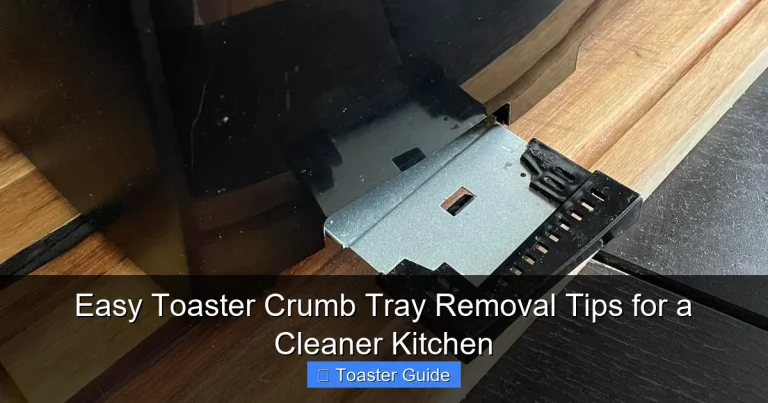
- Check the Crumb Tray: Most toasters have a removable crumb tray at the bottom. Slide it out, empty it, and clean it thoroughly to prevent future jams.
- Test the Toaster: After clearing the bread and crumbs, plug the toaster back in and run a test cycle with a small slice to ensure it’s working properly.
If the bread remains stuck after these steps, the toaster’s internal mechanism may need professional repair or replacement.
Tools You’ll Need to Remove Stuck Bread
- Wooden chopsticks or plastic tongs
- Soft brush or old toothbrush
- Dish soap and warm water for cleaning crumb tray
- Flashlight to inspect inside toaster slots
- Small vacuum cleaner or compressed air (optional)
Having these tools on hand makes quick work of stuck bread removal and toaster cleaning.
How to Prevent Bread from Getting Stuck in Your Toaster
Prevention is the best way to avoid the hassle of stuck bread. Follow these practical tips to keep your toaster running smoothly:
1. Choose the Right Bread Size and Type
Standard toaster slots fit most sliced bread, but extra-thick, artisanal, or homemade bread varieties may not fit well. Avoid bread slices that are too thick, uneven, or have odd shapes. Bagels, English muffins, and specialty breads often require a wider slot toaster or a toaster oven.
2. Keep Your Toaster Clean
Regular cleaning prevents crumbs buildup that causes jams. Empty the crumb tray weekly or more often if you toast daily. Use a soft brush or vacuum to clean inside the slots gently. Check the Breville toaster user manual for model-specific cleaning tips.
3. Avoid Moist or Fresh Bread
Bread with high moisture content is softer and more likely to stick. Let fresh bread sit for a few hours or toast slightly stale bread for better results. This also helps create a crispier toast.
4. Toast at Appropriate Settings
Using the right heat setting helps avoid burning or sticking. Extremely high heat can cause bread to char and stick to heating elements. Start with medium settings and adjust based on your bread type and preference.
5. Don’t Force Bread into Slots
Gently place bread slices into the slots. Forcing oversized pieces can damage your toaster and cause stuck bread. If you often toast thick breads, consider a model designed for that purpose, like the Cuisinart toaster selection.
Cleaning and Maintaining Your Toaster for Best Performance
Keeping your toaster clean and well-maintained prevents stuck bread and extends your appliance’s life. Here’s a simple maintenance routine:
- Unplug the Toaster: Always ensure it’s unplugged before cleaning.
- Empty and Wash the Crumb Tray: Remove the tray, wipe off crumbs, and wash with warm, soapy water. Dry completely before reinserting.
- Clean Inside Slots: Use a soft brush or a can of compressed air to remove crumbs from inside the slots. Avoid using metal objects.
- Wipe Outer Surfaces: Use a damp cloth to clean the toaster exterior. Avoid abrasive materials that may scratch the surface.
- Check for Damage: Inspect the power cord and plug for wear. Replace or repair as needed to avoid electrical hazards.
Regular maintenance not only prevents stuck bread but also keeps your toaster working efficiently. For detailed cleaning instructions, visit the Philips appliance support page.
Common Mistakes That Cause Toaster Bread to Get Stuck
Avoid these common errors that often lead to jammed bread and toaster damage:
- Using Metal Objects to Pry Bread Out: This risks damaging heating coils and causes electric shock.
- Ignoring Crumb Tray Cleaning: Crumbs accumulate quickly and cause jams if not removed regularly.
- Forcing Large or Thick Bread: Not all toasters handle oversized slices; forcing them can break parts.
- Toasting Wet or Frozen Bread Without Preparation: This leads to soggy or stuck bread.
- Neglecting Toaster Maintenance: Dust, crumbs, and wear accumulate over time, causing malfunction.
Being mindful of these habits prevents repeated stuck bread problems and prolongs your toaster’s lifespan.
Pros and Cons of Different Toaster Types to Avoid Stuck Bread
| Toaster Type | Pros | Cons | Best For |
|---|---|---|---|
| Two-Slot Toaster | Compact, affordable, easy to use | Limited slot size, less versatile | Standard sliced bread, small kitchens |
| Four-Slot Toaster | Can toast more bread at once, wider slots available | Larger footprint, higher cost | Families, varied bread types |
| Wide-Slot Toaster | Handles bagels, thick artisan bread | May be more expensive, larger size | Specialty breads, variety |
| Toaster Oven | Multi-functional, can toast, bake, broil | Bulky, slower heating | Versatile cooking needs, large bread slices |
Choosing the right toaster depends on your bread preferences and kitchen space. For more details on selecting a toaster, check the Panasonic toaster support page.
Pro Tips for Smooth Toasting Every Time
- Pre-toast thick or fresh bread on a low setting to dry it slightly before the final toast.
- Use a timer or toaster with a countdown display to avoid over-toasting and burning.
- Store bread properly to maintain ideal moisture and texture for toasting.
- Regularly inspect and clean your toaster’s heating elements visually with a flashlight to catch buildup early.
- Consider a toaster with automatic bread centering for even toasting and fewer jams.
Frequently Asked Questions About Toaster Bread Getting Stuck
Why does my bread get stuck in the toaster after just a few uses?
New toasters might have tighter slots or small manufacturing residues inside. Also, bread size or crumbs can jam the mechanism early on. Clean the crumb tray and slots regularly and avoid forcing large slices to prevent early jams.
Can I use metal tools to remove stuck bread?
It’s best to avoid metal tools inside your toaster since they can damage heating coils or cause electric shock. Use wooden or plastic utensils to safely dislodge stuck bread.
How often should I clean the crumb tray?
For daily users, cleaning the crumb tray once a week is ideal. If you toast less often, clean it every two weeks or when you notice crumbs building up. Regular cleaning helps prevent stuck bread and fire hazards.
Is it better to buy a toaster with wider slots to avoid stuck bread?
If you frequently toast thick or artisanal bread, wide-slot toasters or toaster ovens offer more flexibility and reduce the chance of bread getting stuck. Otherwise, standard slot sizes work well for typical sliced bread.
Can stuck bread damage my toaster?
Yes, forcing stuck bread out or repeated jams can strain the toaster’s springs, heating elements, or electrical components, leading to malfunction or shortened appliance life.
What should I do if my toaster’s eject mechanism is broken?
If the toaster fails to push the bread up after toasting, it may need repair or replacement. Contact the manufacturer or check your Breville toaster user manual for troubleshooting and warranty options.
Is toasting frozen bread more likely to cause bread to get stuck?
Frozen bread has more moisture and stiffness, which can cause sticking. Defrost bread slightly before toasting or use a toaster oven with a defrost setting for better results.
Summary and Final Thoughts
Dealing with stuck bread in your toaster can disrupt your daily routine, but with the right approach, it’s a simple issue to fix and avoid. Regular cleaning, choosing the right bread size, and gentle handling are key to smooth toasting. Using non-metal tools and unplugging your appliance first keeps you safe during removal. Understanding common causes like crumbs buildup and faulty mechanisms empowers you to maintain your toaster well and enjoy perfect toast every time.
Investing in a wide-slot toaster or toaster oven might be worthwhile if you regularly toast thick or specialty breads. Remember, prevention through routine crumb cleaning and careful use saves time and frustration. For more detailed product care, always refer to your toaster’s official manual and manufacturer support resources.
If you want to explore more tips on kitchen appliance care or find a toaster that fits your lifestyle, check out official guides like the Energy Star efficiency guidelines to choose energy-saving models that perform well and last long.