How Often to Clean Toaster: Must-Have Tips for Effortless Maintenance

Keeping your toaster clean may not be at the top of your kitchen to-do list, but it plays a crucial role in maintaining appliance performance, ensuring food safety, and extending the life of your device. If you’ve ever wondered how often to clean toaster interiors and exteriors or what the best cleaning methods are, you’re in the right place. Drawing from years of hands-on experience testing and using various toasters and toaster ovens, I’ll guide you through simple, practical steps to keep your toaster in tip-top shape without hassle.
Why Regular Toaster Cleaning Matters
The toaster is a daily workhorse for many households, delivering everything from crispy toast to reheated leftovers. Over time, crumbs, grease, and even burnt bits accumulate inside, potentially causing uneven cooking, unpleasant odors, or even fire hazards. Cleaning a toaster regularly ensures it continues to perform efficiently, reduces the risk of smoke or sparks, and keeps your kitchen hygienic.
Besides safety, a clean toaster also looks better and lasts longer. Crumbs left inside can attract pests or cause electrical issues, while grease and food residue on the exterior can dull the finish and harbor bacteria.
How Often to Clean Toaster for Best Results
Determining how often to clean a toaster depends on frequency of use, what you cook inside it, and your personal hygiene standards. For most households, a good rule of thumb is:
– Empty the crumb tray weekly if you use your toaster daily.
– Deep clean the interior and exterior monthly or every 3–4 weeks.
– Clean immediately after spills or burnt food buildup to prevent stubborn stains and odors.
If you toast bread multiple times a day or prepare greasy items like bagels with cream cheese or reheated pizza slices, consider cleaning the crumb tray and wiping the exterior more often. Conversely, if your toaster sees occasional use, monthly cleaning should suffice.
By sticking to this schedule, you avoid crumb buildup that can ignite and keep your toaster working smoothly.
Step-by-Step Guide to Cleaning Your Toaster
What You’ll Need
– Soft cloth or sponge
– Mild dish soap
– Small brush or old toothbrush
– Paper towels or microfiber cloth
– Vacuum cleaner with brush attachment (optional)
– Compressed air can (optional)
1. Unplug and Cool Down
Safety first: always unplug your toaster and let it cool completely before cleaning to avoid electrical shock or burns.
2. Remove and Empty the Crumb Tray
Most modern toasters have a removable crumb tray at the bottom. Slide it out gently and dump crumbs into the trash. Wash the tray with warm, soapy water, rinse, and dry thoroughly before reinserting.
If your model doesn’t have a tray, turn the toaster upside down and gently shake to dislodge crumbs onto a paper towel or sink.
3. Clean the Interior
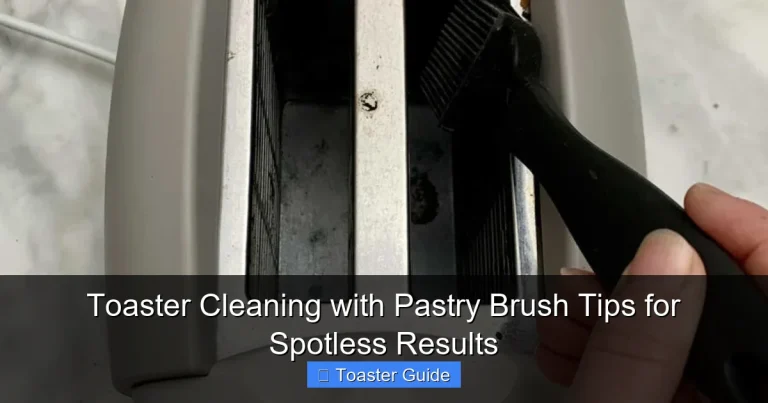
Use a small brush or an old toothbrush to sweep out crumbs and debris stuck inside the slots. For hard-to-reach crumbs, a vacuum cleaner with a brush attachment or a can of compressed air can help clear out the nooks.
Avoid inserting metal objects like knives or forks inside the toaster, as they can damage heating elements or cause shocks.
4. Wipe the Exterior
Dampen a soft cloth or sponge with mild dish soap and warm water. Wipe down the toaster’s exterior surfaces, knobs, and buttons. For stainless steel appliances, use a cleaner specifically designed for stainless steel or a mix of vinegar and water to remove fingerprints and smudges.
Dry the surface with a paper towel or microfiber cloth to prevent streaks.
5. Reassemble and Test
Once all parts are dry, reassemble the toaster and plug it back in. Test with a slice of bread to ensure it’s working properly.
Special Tips for Toaster Oven Cleaning
Toaster ovens require similar but slightly more detailed care due to their larger interiors and additional components like trays and racks.
– Remove crumb trays and racks regularly and wash with warm soapy water.
– Wipe interior walls with a damp cloth; avoid abrasive cleaners that can damage coatings.
– For stubborn stains, a paste of baking soda and water applied gently can help lift grime.
– Consult your model’s manual for specific cleaning instructions; many manufacturers like Breville provide detailed guides in their Breville toaster user manual.
How to Avoid Frequent Deep Cleaning
You can reduce the need for deep cleaning by adopting some simple habits:
– Use a toaster cover or keep it inside a cabinet when not in use to prevent dust buildup.
– Toast smaller portions to minimize crumb spillage.
– Avoid dripping butter or spreads inside the toaster slots.
– Clean crumb trays weekly to prevent buildup.
Common Mistakes to Avoid When Cleaning a Toaster
– Never immerse the toaster in water. This can damage electrical components and pose safety risks.
– Avoid harsh chemicals or abrasive scrubbers that can scratch or damage the finish.
– Don’t use metal tools inside the toaster slots. This risks damage and electrocution.
– Don’t forget to unplug before cleaning. This is critical for safety.
Maintaining Your Toaster for Longevity
Regular cleaning is just one part of toaster care. Here are additional tips to keep your appliance running smoothly:
– Check the power cord for damage and replace if frayed.
– Avoid overloading the slots with thick bread or oversized items.
– Store your toaster in a dry place to prevent moisture damage.
– Refer to the manufacturer’s maintenance recommendations. Brands like Philips provide excellent advice on their Philips appliance support page.
Energy Efficiency and Safety Considerations
An efficient toaster not only saves you time but also energy. Keeping your appliance clean helps it heat evenly and reduces cooking times. For energy-saving tips and appliance standards, the Energy Star efficiency guidelines offer useful information on choosing and maintaining small kitchen appliances.
From a safety perspective, the FDA recommends regular cleaning of cooking appliances to avoid contamination and fire risks. For more on food safety and appliance hygiene, visit the FDA food safety recommendations page.
FAQs About Toaster Cleaning
Q1: How often should I clean the crumb tray?
Empty it at least once a week if you use your toaster daily. For less frequent use, clean it monthly.
Q2: Can I put my toaster tray in the dishwasher?
Check your model’s manual first. Many crumb trays are dishwasher safe, but some require hand washing.
Q3: What if my toaster smells burnt after cleaning?
Run a few cycles with plain bread to burn off any residual moisture or cleaning product.
Q4: How do I clean hard-to-reach crumbs inside the toaster?
Use a small brush, vacuum cleaner with a brush attachment, or compressed air to dislodge crumbs safely.
Q5: Is it safe to use vinegar to clean my toaster?
Yes, diluted vinegar works well for wiping the exterior but avoid getting liquid inside the toaster slots.
Q6: How do I prevent crumbs from falling inside?
Use smaller slices or toaster bags designed to contain crumbs while toasting.
Q7: Can I clean the heating elements inside the toaster?
Avoid touching heating elements directly. Instead, gently brush crumbs away without applying pressure.
—
Keeping your toaster clean doesn’t have to be a chore. By following these straightforward tips and cleaning schedules, you’ll enjoy better-tasting toast, a safer kitchen, and a longer-lasting appliance. For detailed care instructions, always consult your specific toaster’s manual or support pages, such as the Cuisinart toaster oven cleaning guide. A little regular maintenance goes a long way in making your kitchen routine smoother and more enjoyable.