How to Use KitchenAid Pasta Attachment Like a Pro
Use a firm, rested dough and feed it slowly through the KitchenAid pasta attachment. Clean it dry, follow the manual, and don’t force the dough if it jams.
If you want to make fresh pasta at home, the KitchenAid pasta attachment can make the job much easier. The key is simple: make the dough right, set up the mixer safely, and feed the dough at the right pace.
This guide shows how to use KitchenAid pasta attachment in a clear, step-by-step way. It also covers dough tips, common mistakes, cleaning, and when the attachment makes sense for your kitchen.
- Prep matters: Firm, rested dough rolls better and cuts cleaner.
- Go slow: Feed small pieces at a steady mixer speed.
- Avoid force: Stop if dough jams or the attachment strains.
- Clean dry: Brush off dough and follow your manual for care.
What the KitchenAid Pasta Attachment Does and Why It Matters
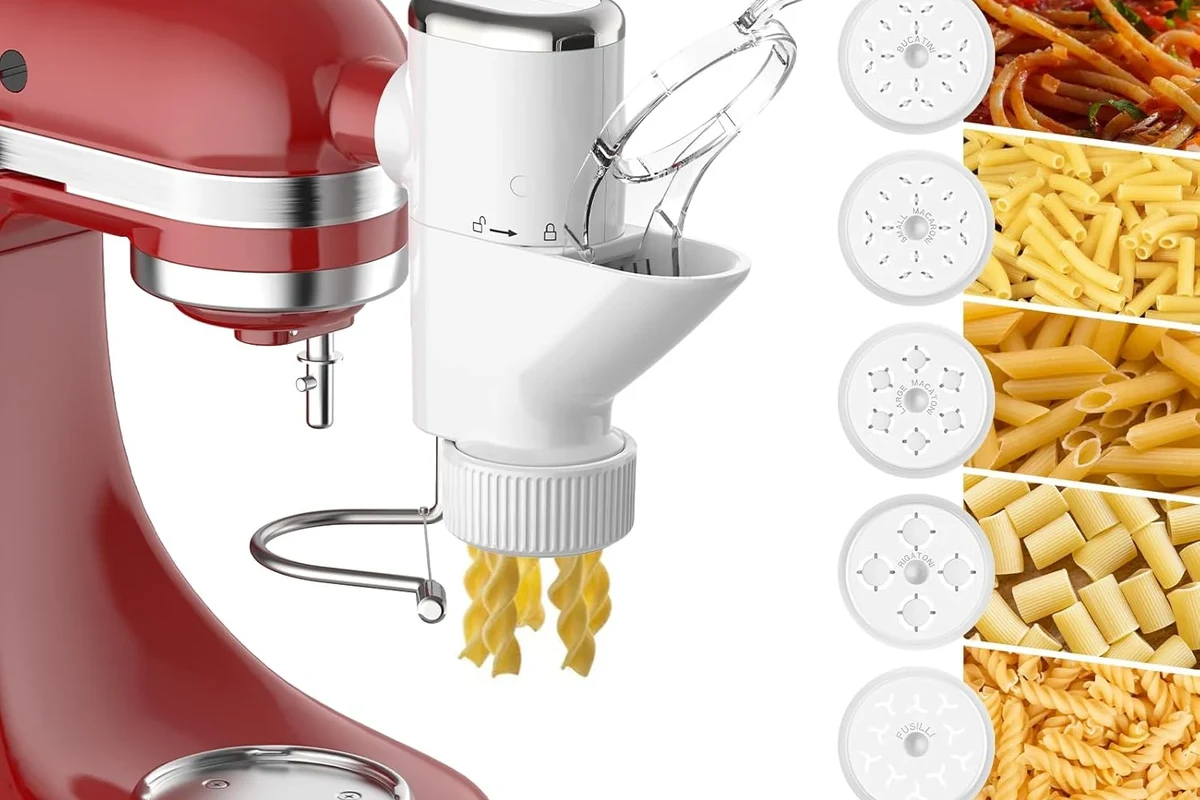
A KitchenAid pasta attachment turns a stand mixer into a pasta-making tool. Depending on the model, it can roll dough, cut sheets, and shape noodles with less hand work.
That matters because pasta dough can be tiring to roll by hand. With the right setup, you get more even sheets and a smoother process.
How the attachment fits on the mixer
The attachment connects to the mixer’s power hub. You remove the hub cover, line up the attachment, and secure it in place.
Most models use the mixer to power the roller or cutter. Always check your manual, since fit and use can vary by model.
KitchenAid makes several pasta attachments. Your exact steps may differ a little by model, so the manual should lead the way.
What kinds of pasta it can make
Many KitchenAid pasta attachments help make sheets for lasagna, fettuccine, and spaghetti. Some models also support ravioli or other shapes.
Fresh dough works best for most attachments. Very wet dough can clog the rollers, while very dry dough can crack.
Who this guide is for
This guide is for home cooks who want fresh pasta without a lot of hand rolling. It also helps if you already own a KitchenAid stand mixer and want to use it more often.
If you make pasta once in a while, the attachment can still be useful. If you make it often, the time savings can feel even bigger.
Make Fresh Pasta with Less Guesswork
Use the mixer, feed the dough slowly, and keep the texture right for cleaner cuts.
How to Use KitchenAid Pasta Attachment Step by Step
The basic process is easy. Set up the mixer, prep the dough, roll it into sheets, then cut it into noodles.
Turn off and unplug the mixer before attaching the pasta tool.
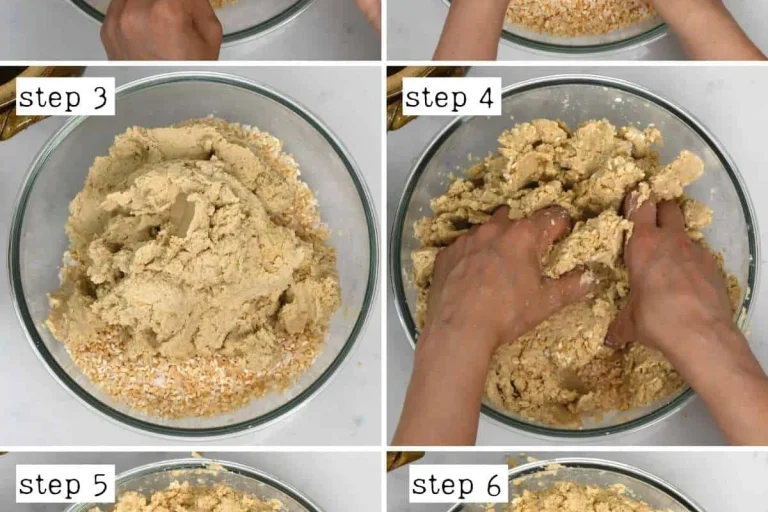
Mix until the dough feels smooth, firm, and not sticky.
Feed small pieces through the roller and reduce thickness little by little.
Pass the sheet through the cutter after it rests a bit and feels dry on the surface.
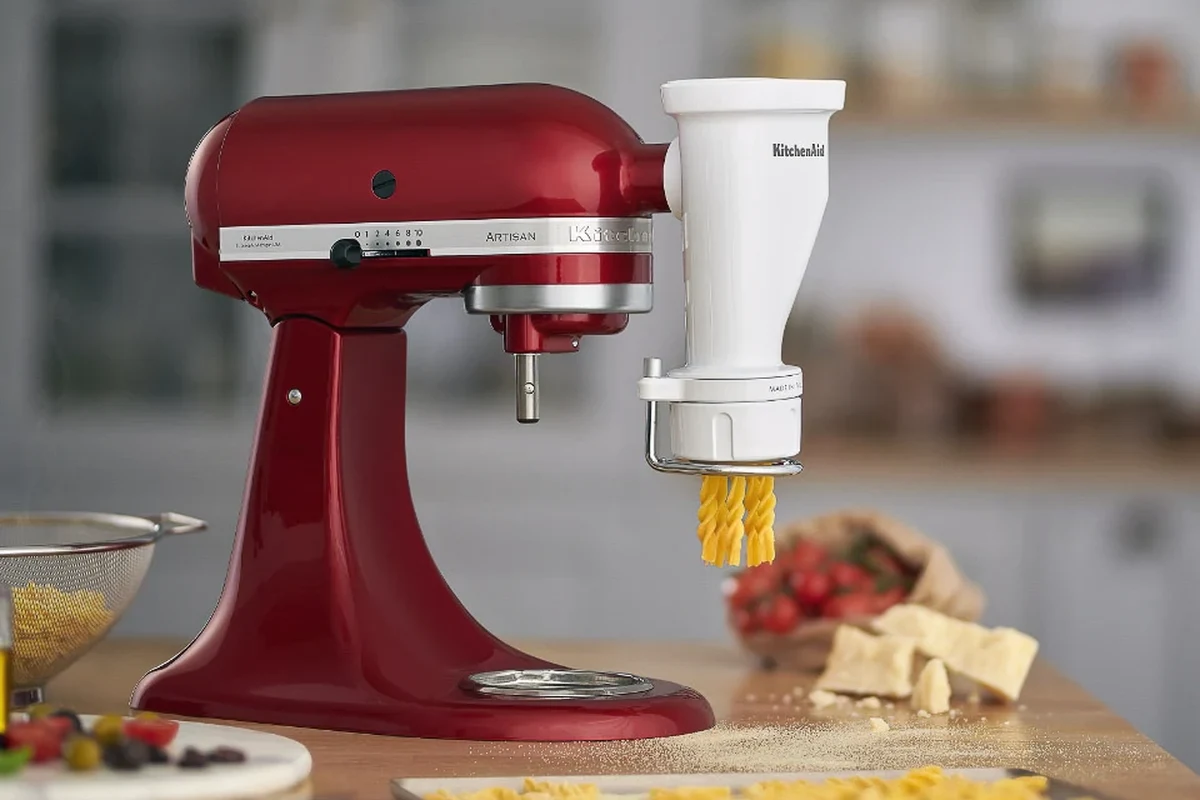
Set up the mixer and attach the pasta tool
First, switch off the mixer and unplug it. Then remove the hub cover and attach the pasta tool firmly.
Make sure the attachment sits straight. If it feels loose or forced, stop and check the fit again.
Never attach or remove the pasta accessory while the mixer is running. Keep fingers away from moving parts at all times.
Prepare the dough for the best results
Good dough makes the biggest difference. It should feel smooth, elastic, and easy to handle.
Let the dough rest before rolling. Resting helps the flour hydrate and makes the dough less likely to tear.
Feed, roll, and cut the pasta
Start with a small piece of dough. Flatten it a little with your hands before feeding it into the roller.
Pass it through once, fold if needed, then roll again. Keep lowering the thickness setting one step at a time.
Once the sheet is ready, let it dry for a short time if your recipe calls for it. Then run it through the cutter.
Lightly dust the dough with flour if it sticks. Use a small amount so the sheet does not get dry and rough.
Know the right speed settings
Use the speed listed in your manual. Many pasta attachments work best at a steady, moderate speed.
Too much speed can pull the dough unevenly. A slower, controlled feed usually gives cleaner sheets.
Best Dough, Ingredients, and Pasta Settings
The attachment can only do so much if the dough is off. Think of the tool as the helper, not the fix.
Simple dough basics that work well
A basic pasta dough usually uses flour and eggs, with a little water if needed. Some recipes add salt, while others leave it out and season the cooking water instead.
The dough should hold together without feeling wet. If it cracks, it may need a touch more moisture.
Flour, eggs, water, and salt choices
Different flours change the feel of the dough. All-purpose flour can work, but many cooks prefer pasta flour or semolina blends for better texture.
Eggs add richness and color. Water helps if the dough seems too stiff, but add it slowly.
A dough that rests often rolls more smoothly because the flour has time to absorb moisture.
How dough texture changes the final pasta
Soft dough can stick to the rollers. Dry dough can break apart before it reaches the cutter.
The best dough usually feels firm, smooth, and slightly springy. If it tears, adjust the hydration before you keep rolling.
Common Mistakes and How to Avoid Them
Most pasta problems come from dough texture, speed, or trying to rush the process. The good news is that these issues are easy to spot.
Why sticky dough causes trouble
Sticky dough clings to the roller and can bunch up. That makes the sheet uneven and harder to cut.
Dust the dough lightly with flour and let it rest a bit longer. If it still sticks, the dough may need more flour next time.
The dough wraps around the roller or sticks to the cutter.
Pause, dust lightly with flour, and check that the dough is firmer before feeding it again.
What happens when dough is too dry
Dry dough tends to crack at the edges. It may also break before it reaches the right thickness.
If this happens, knead in a tiny bit of water. Add it slowly so you do not swing too far the other way.
How to stop tearing, clogging, and uneven cuts
Feed small pieces instead of large chunks. Large pieces can fold, jam, or stretch unevenly.
Also, keep the dough sheet even before cutting. A lopsided sheet can lead to ragged noodles.
- Roll in small steps
- Dust with a light hand
- Let dough rest before cutting
- Forcing dough through fast
- Using wet, sticky dough
- Skipping the rest time
Safety Tips and Smart Kitchen Habits
KitchenAid pasta attachments are simple, but they still need careful use. A little caution helps protect both you and the mixer.
Keep hands, hair, and clothes clear
Keep fingers away from the rollers and cutters. Tie back long hair and avoid loose sleeves near the mixer.
It’s easy to focus on the dough and forget the moving parts. Stay alert until the mixer is off and unplugged.
Use the mixer at the right pace
Work at the speed listed in the manual. Faster is not better here.
A steady pace helps the dough move cleanly through the attachment. It also lowers the chance of strain on the tool.
Protect the attachment from force and damage
Do not push hard if the dough jams. Stop the mixer first, then clear the issue safely.
Forcing the tool can bend parts or wear it out faster. If the attachment looks damaged, stop using it and check the manual.
Follow the appliance manual and stop using damaged equipment.
Cleaning and Maintenance for Longer Life
Cleaning matters because dried dough can harden inside the attachment. That makes the next use harder and can shorten the tool’s life.
How to clean the attachment the right way
Let any dough bits dry a little, then brush them away if your manual allows it. Many pasta attachments should not be washed in water unless the maker says they can be.
Check your model instructions before cleaning. That is the safest way to avoid rust, damage, or warranty trouble.
Brush off flour and dough, then wipe the outside if the manual allows it.
Inspect for loose parts, stuck dough, or signs of wear.
What not to do with metal parts
Do not soak metal parts unless the manual says it is safe. Avoid harsh scrubbers that can scratch the surface.
Also, do not put the attachment back on the mixer while it is still wet. Dry parts last longer.
Storage tips that help prevent wear
Store the attachment in a dry place. Keep it in a box, drawer, or cabinet where it will not get knocked around.
If your model came with a case, use it. Simple storage can protect the rollers and cutters from dust and dings.
Is the KitchenAid Pasta Attachment Worth It in 2026?
For many home cooks, yes. It’s a smart add-on if you already use a KitchenAid mixer and want fresh pasta more often.
Cost, value, and who gets the most use from it
The value depends on how often you make pasta and how much you dislike hand rolling. If you make pasta for family meals or special dinners, the attachment can save time and effort.
It also makes sense if you like the idea of a cleaner, more repeatable process. The main trade-off is that it only works well when the dough is prepared correctly.
When a manual roller may be a better choice
A manual roller can be a better fit if you make pasta only once in a while. It may also suit cooks who want more control without relying on a mixer hub.
Manual tools can be simpler to store and sometimes easier to clean. On the other hand, they ask for more elbow grease.
You already own the mixer and want faster, easier rolling.
You make pasta less often or want a simpler standalone tool.
Final recommendation for home cooks
If you want fresh pasta with less hand work, the KitchenAid pasta attachment is a strong choice. It works best for cooks who value convenience and already trust their stand mixer.
If you want the simplest setup possible, a manual roller may still be the better fit. Either way, the dough rules stay the same: keep it smooth, rest it well, and feed it slowly.
The KitchenAid pasta attachment is a practical upgrade for home cooks who make pasta more than once in a while. It’s not magic, though. Good dough, careful feeding, and proper cleaning matter more than the tool itself.
- Start with firm, rested dough for the best roll.
- Feed small pieces slowly and avoid forcing jams.
- Clean only as your manual allows, and keep parts dry.
- Choose the attachment for convenience, or a manual roller for simplicity.
Frequently Asked Questions
Unplug the mixer, attach the pasta tool, and make sure it locks in place. Then prepare firm dough and feed it through slowly in small pieces.
Use the speed listed in your manual, since it can vary by model. A steady, moderate pace usually gives the best control.
Sticky dough usually has too much moisture or needs more rest time. Dust it lightly with flour and adjust the dough before you keep rolling.
Not always. Check your manual first, because many attachments need dry brushing instead of soaking or washing.
A smooth, firm pasta dough works best. Very wet dough can clog the rollers, while very dry dough can crack and tear.
It’s a smart choice if you already own a KitchenAid mixer and make pasta often. A manual roller may be better if you want a simpler standalone tool.