Toaster Troubleshooting Guide: Must-Have Tips for Effortless Fixes
Slug: toaster-troubleshooting-guide-must-have-tips-for-effortless-fixes
Toaster Troubleshooting Guide: Must-Have Tips for Effortless Fixes
Quick Summary: If your toaster isn’t working right, simple fixes like checking the power source, cleaning crumbs, or adjusting settings often solve the problem quickly. This toaster troubleshooting guide offers straightforward steps anyone can follow to get your appliance back to perfect toast in minutes.
Almost everyone has faced toaster troubles—whether it won’t heat, the toast is uneven, or it won’t pop up. These common issues can be frustrating, especially when you need breakfast on the go. The good news? Most toaster problems have easy, beginner-friendly solutions. This guide breaks down step-by-step fixes, practical tips, and common mistakes to avoid. By the end, you’ll feel confident handling your toaster like a pro and know exactly what to do next time it acts up.
Step-by-Step Toaster Troubleshooting Guide
- Check the Power Source
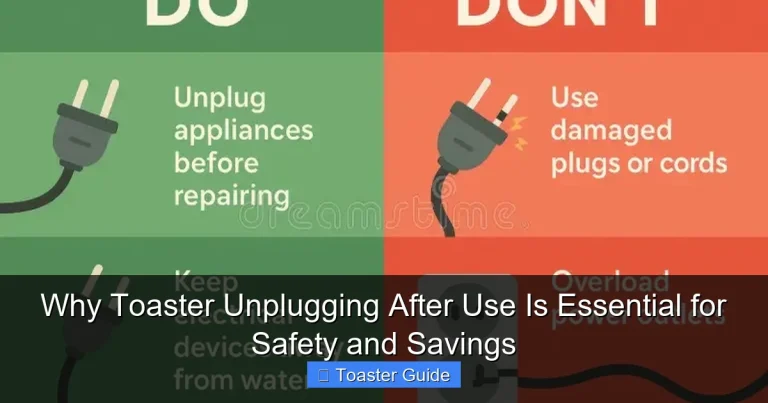
Ensure your toaster is plugged in securely. Try plugging it into another outlet to rule out a faulty socket. Sometimes the issue is as simple as a tripped circuit breaker or loose connection. - Inspect the Power Cord
Look for any visible damage like frayed wires or cuts. A damaged cord can prevent the toaster from heating safely. If you spot damage, unplug immediately and consider professional repair or replacement. - Clean Out Crumbs and Debris
Unplug the toaster and remove the crumb tray. Empty it and use a soft brush or compressed air to clear crumbs inside. Built-up debris can block heating elements or cause uneven toasting. - Test the Toasting Settings
Make sure the browning control dial or buttons are set correctly. Sometimes settings accidentally get changed. Test various levels to see if the toaster heats unevenly or not at all. - Check the Lever and Eject Mechanism
If the toast doesn’t pop up, the lever or spring may be stuck. Gently wiggle the lever while unplugged to free any jam. Avoid forcing it, which might break internal parts. - Look for Visible Damage Inside
With the toaster unplugged, peek inside for broken wires or burnt components. If you see obvious damage, it’s safer to replace the toaster or consult a technician. - Reset or Test the Thermal Fuse
Some toasters have a thermal fuse that cuts power if overheated. If your unit won’t heat at all, this fuse might need resetting or replacement. Refer to your model’s manual for instructions, like the Breville toaster user manual. - Try a Different Bread Type
Sometimes, the bread’s moisture or thickness affects performance. Thin or stale bread toasts faster, while thick slices need more time. Experiment to find the sweet spot for your toaster.
Essential Lists for Toaster Troubleshooting Success
Tools and Materials You’ll Need
- Soft brush or small handheld vacuum
- Compressed air canister
- Multimeter (for checking electrical components)
- Microfiber cloth
- Replacement crumb tray (if original is damaged)
- Small screwdriver set (for opening casing if needed)
Common Mistakes to Avoid
- Ignoring the power source or outlet issues
- Using sharp objects inside the toaster to remove crumbs
- Forcing stuck levers or buttons
- Skipping regular cleaning and maintenance
- Overloading the toaster with thick or wet bread
- Attempting complex repairs without proper knowledge or tools
Pro Tips for Better Toaster Performance
- Always unplug before cleaning or inspecting internal parts
- Empty the crumb tray weekly to prevent buildup and fire risk
- Use the correct setting for your bread type to avoid uneven toasting
- Check manufacturer support pages for model-specific advice, such as the Philips appliance support page
- Keep your toaster dry and store it away from moisture
- Consider buying Energy Star certified models for better efficiency and safety, as recommended by Energy Star efficiency guidelines
Toaster Troubleshooting: Causes and Solutions Comparison
| Problem | Likely Cause | Simple Fix |
|---|---|---|
| Toaster won’t heat | Power issue, blown thermal fuse | Check outlet, reset fuse, consult manual |
| Toast is uneven | Crumbs blocking heating elements | Clean crumb tray and interior |
| Lever won’t stay down | Stuck eject mechanism or broken spring | Gently free lever; replace parts if broken |
| Toast burns quickly | Incorrect settings or faulty thermostat | Adjust settings; if persists, get repair |
| Toaster smells like burning | Crumbs or debris overheating | Unplug and clean thoroughly |
Toaster Features, Maintenance, and Safety Guide
| Feature | Maintenance Tip | Safety Advice |
|---|---|---|
| Crumb tray | Empty and clean weekly | Remove crumbs to avoid fire risk |
| Browning control dial | Test settings regularly | Don’t leave toaster unattended on high settings |
| Lever and spring | Check for smooth operation | Avoid forcing stuck lever |
| Heating elements | Clean crumbs carefully | Unplug before cleaning to avoid shock |
| Thermal fuse | Refer to manual for reset/replacement | Only replace fuse with exact match |
Frequently Asked Questions About Toaster Troubleshooting
Why does my toaster not heat up even though it’s plugged in?
If your toaster is plugged in but not heating, the issue could be a tripped circuit, blown thermal fuse, or faulty power cord. First, test the outlet with another appliance. If the outlet works, check the thermal fuse—some models allow resetting. When in doubt, consult your toaster’s manual like the Cuisinart toaster user manual for model-specific advice.
How often should I clean my toaster to avoid problems?
Cleaning your toaster’s crumb tray once a week is ideal to prevent buildup that can block heating elements or cause burning smells. Use a soft brush or compressed air to clear crumbs inside. Regular cleaning extends your toaster’s life and ensures even toasting. Always unplug the appliance before cleaning to stay safe.
What should I do if the toaster lever gets stuck?
A stuck lever usually means crumbs or debris are jamming the eject mechanism. Unplug the toaster and gently wiggle the lever to free it. Avoid using sharp tools inside, which can damage parts. If the lever still won’t stay down, the spring may be broken and might need professional repair or replacement.
Can I fix electrical issues in my toaster myself?
Simple fixes like checking the power cord or outlet are fine for beginners. However, electrical repairs involving wiring or fuses should be done by professionals to avoid injury or damage. Refer to manufacturer support pages, such as the Breville toaster support, for guidance or authorized service centers.
Why is my toast burning on one side but not the other?
Uneven toasting often results from crumbs blocking heating elements or a malfunctioning thermostat. Cleaning your toaster’s interior usually fixes this. If the problem persists, the heating element may be faulty. Testing different browning settings can help pinpoint the issue before considering replacement.
Is it safe to use a toaster if it smells like burning plastic?
A burning plastic smell indicates overheating or melted components inside. Stop using the toaster immediately and unplug it. Check for stuck crumbs or foreign objects. If the smell continues after cleaning, it’s best to replace the toaster or have it inspected by a professional to avoid fire hazards, in line with USDA food safety recommendations.
How do I choose a toaster that’s easy to maintain and troubleshoot?
Look for models with removable crumb trays, clear control dials, and simple designs. Brands like Breville and Philips offer detailed manuals and support pages, making troubleshooting easier. Energy Star certified toasters not only save energy but often come with safety features. Reading customer reviews can also highlight common issues and ease of maintenance.
Conclusion
Toaster problems are common but usually easy to fix with the right approach. Start by verifying power sources and cleaning crumbs regularly to keep your toaster running smoothly. Understanding simple troubleshooting steps like checking the lever, settings, and thermal fuse can save you time and money. Avoid common mistakes like forcing stuck parts or ignoring safety precautions. With a little care and attention, you can enjoy perfectly toasted bread every day without hassle. Remember to consult your toaster’s official manuals or support pages, such as the Philips appliance support page, for model-specific instructions. Feel confident to tackle minor fixes yourself, and don’t hesitate to seek professional help for electrical issues. Happy toasting!
[Related Article: Best Toaster Ovens]
[Related Article: How to Clean Kitchen Appliances Safely]
[Related Article: Top Energy Efficient Kitchen Gadgets]