How to Dry Pasta Nests for Perfect Homemade Pasta
Dry pasta nests on a clean tray, rack, or towel in a dry room with good air flow. They’re ready when they feel firm, dry in the center, and no longer sticky.
Drying pasta nests is simple once you know the goal. You want the noodles dry on the outside, but not brittle or cracked. In most home kitchens, air drying on a tray or rack works best.
- Air flow matters: Space nests apart so they dry evenly.
- Check the center: The thickest part should feel dry before storage.
- Use gentle methods: Low heat or room drying works better than hot ovens.
- Avoid humidity: Damp rooms slow drying and raise spoilage risk.
- Store only when ready: Fully dry pasta keeps better and clumps less.
How to Dry Pasta Nests: The Simple Answer

Pasta nests dry best in a clean, dry spot with good air flow. Spread them out so air can reach all sides. Then let them sit until they feel firm and no longer sticky.
What pasta nests are and why drying matters
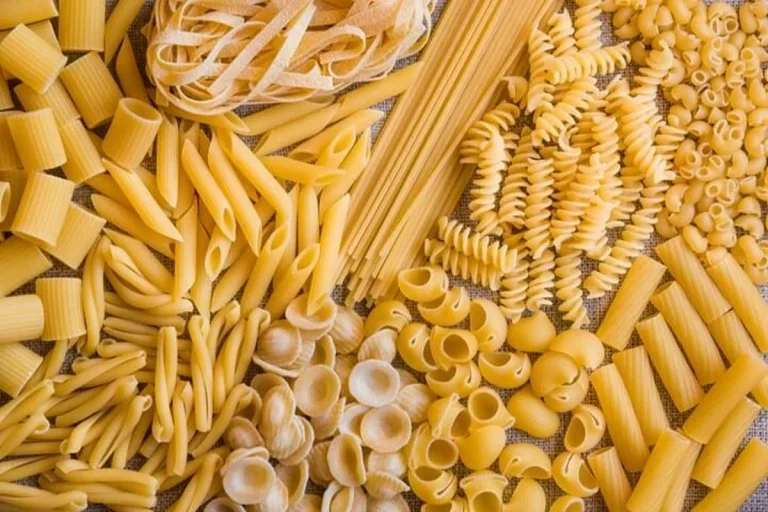
Pasta nests are small coils of fresh pasta shaped into loose bundles. People often make them with tagliatelle, fettuccine, or similar noodles.
Drying matters because it helps the pasta keep its shape. It also lowers surface moisture, which makes storage easier and reduces clumping.
For fresh pasta, drying is not always about long-term storage. Sometimes you only need a short dry time before cooking. Other times you want the nests fully dry for later use.
How long drying usually takes
Drying time depends on humidity, nest size, and dough thickness. Small nests may dry in a few hours. Larger nests can take much longer.
In a dry room with steady air flow, many nests need several hours to feel firm. If the air is damp, they may need overnight drying or more.
Drying time varies by flour type, egg content, room humidity, and how tight the nest is.
If you plan to store pasta for later, give it extra time. A nest that feels dry on the outside may still hold moisture inside.
What “fully dry” looks and feels like
Fully dry pasta feels firm all the way through. It should not bend much when you move it. It should also sound dry and light when handled.
The surface should look matte, not wet or shiny. If the strands stick together, they likely need more time.
Fresh pasta dries faster when the strands are spread with space around each nest.
Best Ways to Dry Pasta Nests at Home

You do not need fancy tools for this job. A tray, a rack, or even a clean towel can work well. The best choice depends on your space and how many nests you made.
Air drying on a tray or rack
This is the easiest method for most home cooks. Place the nests on a clean tray or wire rack. Leave space between each one so air can move around them.
A rack helps the bottom dry faster. A tray works too, but you may need to turn the nests once or twice.
Using a pasta drying rack
A pasta drying rack keeps nests lifted and separated. It works well when you make several batches. It also helps reduce flat spots from sitting on a tray.
Still, a rack is not required. If you have a small kitchen, a tray or towel may be easier to manage and store.
Drying on a clean kitchen towel
A clean towel can work well for small batches. Lay the towel flat and place the nests with space between them. Choose a towel that does not shed lint.
This method is handy if you lack counter space. Just make sure the towel stays dry. If it gets damp, move the pasta to a fresh one.
When to use a dehydrator or oven
A dehydrator can help in humid homes. It gives steady air flow and low heat. That said, follow the machine manual closely.
An oven is less ideal for pasta nests. Heat can dry the outside too fast and crack the pasta. If you use an oven at all, keep the heat very low and watch it closely.
Use only low, gentle drying methods. High heat can warp, crack, or cook fresh pasta before it dries evenly.
What You Need Before You Start
Good drying starts before the pasta ever hits the tray. The dough, the nest size, and the space around it all matter. Small changes can make a big difference later.
Best flour types for shaped nests
Most pasta doughs use all-purpose flour, semolina, or a blend. Each one dries a little differently. Semolina blends often hold shape well, while softer doughs can feel more delicate.
If your dough feels very soft, the nests may slump as they dry. A firmer dough usually keeps a better shape.
Ideal nest size and thickness
Keep nests small and even. Thick, tight bundles trap moisture inside. Loose, medium nests dry more evenly.
Try to make each nest about the same size. That way, they dry at a similar pace. Uneven nests can leave you with some ready and some still damp.
Helpful tools and simple setup
You only need a few basics. A tray, rack, towel, or drying stand will do. A clean kitchen with low moisture helps more than any special gadget.
If your kitchen gets steamy, move the pasta away from the stove and sink. A quiet corner with air flow is usually better.
Step-by-Step Guide to Drying Pasta Nests
The process is easy if you take it one step at a time. Shape the nests well, give them space, and check them before storing. That simple routine prevents most problems.
Loosely coil the noodles into small bundles. Do not pack them too tight.
Use a dry tray, rack, or towel in a cool, airy spot.
Leave room between nests so the center dries as well as the outside.
Turn nests gently if they sit on a flat tray or towel.
Make sure the pasta feels dry, firm, and separate before you pack it away.
Shape the nests the right way
Start with cut noodles that are lightly floured. Then form loose coils with your hand. The nest should hold together without being squeezed hard.
If you press too firmly, the center may stay damp. A loose shape lets air move through the pile.
Set up a clean drying space
Pick a spot away from steam, splashes, and strong odors. The area should stay clean while the pasta dries.
A nearby fan can help if it does not blow dust onto the pasta. Keep the air gentle, not harsh.
Flip or rotate for even drying
If the nests sit on a tray or towel, turn them once or twice. This helps the bottom dry at the same pace as the top.
Use clean hands or a dry spatula. Move the nests gently so they do not break.
Check for moisture before storing
Before you store the pasta, feel the thickest part of each nest. It should not feel cool and damp. If it does, give it more time.
When in doubt, wait a little longer. Storing pasta too soon can lead to mold or clumping.
How to Tell If Pasta Nests Are Dry Enough
You do not need special tools to check dryness. A few simple tests can tell you a lot. Look, touch, and bend the pasta gently.
Visual signs of proper drying
Dry nests usually look dull instead of glossy. The strands should stay separate. You should not see wet spots or soft patches.
If the pasta still looks shiny, it likely needs more time. Shiny spots often mean hidden moisture.
Touch test and break test
Gently touch the thickest part of the nest. It should feel dry and firm. It should not leave dough on your fingers.
For a simple break test, bend one noodle. Fully dry pasta snaps more cleanly than fresh pasta. Semi-dry pasta bends more.
- Check the center of the nest, not just the outer strands.
- Use the same drying spot each time for steadier results.
- Keep a small batch separate if you want to test doneness first.
Differences between fresh, semi-dry, and fully dry pasta
Fresh pasta feels soft and flexible. It is meant for quick cooking or short rest times.
Semi-dry pasta feels firmer on the outside, but still has some bend. Fully dry pasta feels firm throughout and stores better.
| Type | Feel | Best Use |
|---|---|---|
| Fresh | Soft and flexible | Cook soon after shaping |
| Semi-dry | Firm outside, slight bend | Short rest before cooking |
| Fully dry | Firm through the center | Storage for later use |
Common Mistakes and How to Avoid Them
Most drying problems come from too much moisture or not enough space. The good news is that these are easy to fix. A few small habits can save a lot of pasta.
Drying in humid rooms
Humid rooms slow drying and can leave pasta sticky. Bathrooms, steamy kitchens, and laundry areas are poor choices.
Use the driest room you have. If your home is humid, give the pasta more time and better air flow.
Stacking nests too close together
When nests touch, they trap moisture and stick. That can lead to uneven drying and clumps.
Space them apart from the start. It is much easier than trying to separate stuck noodles later.
The nests feel sticky or soft in the middle.
Move them to a drier spot, spread them out, and give them more time.
Overdrying or cracking the pasta
If pasta dries too fast, it can crack or break. This happens more often with hot air or very dry rooms.
Use gentle air flow and check the pasta often. You want dry, not brittle.
Storing too soon
Putting pasta away before it is ready can cause mold or spoilage. It can also make the nests stick together in the container.
Always make sure the center feels dry before storage. If you are unsure, leave it out a bit longer.
- Dry pasta in a low-moisture room.
- Leave clear space between nests.
- Check the thickest part before storing.
- Do not dry pasta near steam or splashes.
- Do not pile nests on top of each other.
- Do not store pasta while it still feels cool and damp.
Storage, Safety, and Cleanup Tips
Once the pasta is dry, storage should stay simple. Clean tools and dry containers make the job much easier. Good cleanup also helps prevent mold and stale smells.
How to store dried pasta nests
Store fully dry nests in a clean, dry container. A sealed jar, box, or bag can work if the pasta is truly dry.
Keep the container in a cool place away from heat and moisture. Label it if you made several batches.
Food safety signs to watch for
If pasta smells off, feels damp, or shows discoloration, do not use it. Mold can show up as spots or fuzzy growth.
When you see signs of spoilage, throw the pasta out. It is not worth the risk.
Stop using any pasta that smells sour, shows mold, or stays damp after long drying.
Cleaning racks, towels, and tools
Wash racks and tools after each use. Let them dry fully before storing them. Damp tools can add moisture back into your next batch.
For towels, use a clean one each time if possible. If you reuse a towel, make sure it is fresh, dry, and free of odors.
Wash trays, racks, and tools. Dry them fully before putting them away.
Check for crumbs, moisture, or lint that could stick to pasta.
Is Drying Pasta Nests Worth It?
For many home cooks, yes. Drying makes pasta easier to store and helps nests keep their shape. It also gives you more control over batch cooking.
Benefits for taste, texture, and storage
Properly dried pasta can cook with a more even texture. It also stores better than very fresh pasta. That makes it a smart choice when you want to prep ahead.
Drying can also reduce last-minute stress. You can make pasta in one session and cook it later.
Limits for busy cooks and small kitchens
Drying does take space and time. If your kitchen is crowded, finding a clean drying area can be hard.
In a busy home, short drying may be more practical than full drying. That works fine if you plan to cook the pasta soon.
Best choice for beginners and home pasta makers
If you are new to pasta making, start small. Use a tray or towel and keep the nests loose. That gives you a simple setup without extra gear.
For most people, air drying is the best first step. It is low cost, easy to clean up, and flexible for different kitchen sizes.
The best way to dry pasta nests is to air dry them in a clean, dry spot with good space between each nest. Use a rack or towel if that fits your kitchen better, and wait until the center feels fully dry before storing.
In short, the safest and easiest method is the one that keeps the pasta dry, separated, and out of humid air. If you keep the setup simple, you’ll get better results with less fuss.
Frequently Asked Questions
Drying time varies a lot. Small nests may dry in a few hours, while larger ones can take overnight or longer.
Air drying on a clean tray, rack, or towel is the easiest method. Leave space between the nests so air can move around them.
They should feel firm, dry, and not sticky in the center. The strands should also separate easily and look matte, not shiny.
You can, but it is not the best choice. Heat can dry the outside too fast and cause cracks, so keep the heat very low if you try it.
Damp pasta can clump, spoil, or grow mold. Always wait until the thickest part feels dry before packing it away.
Use a clean, dry container and keep it in a cool place. Check for odd smells, discoloration, or damp spots before cooking.