How to Make Vanilla Bean Paste at Home Easily
Homemade vanilla bean paste is easy to make with vanilla beans, a sweet base, and a small blender. It works best when you want rich flavor, visible specks, and more control than extract.
If you want deep vanilla flavor with tiny specks in every spoonful, homemade vanilla bean paste is a smart project. It’s easy to make, and it gives you more control than store-bought versions.
- Simple swap: Use paste in many recipes instead of extract.
- Best use: It shines in cakes, custards, and frostings.
- Texture matters: Add liquid slowly to keep it thick.
- Storage counts: Use a clean jar and watch for spoilage.
- Trade-off: Homemade paste gives control, but results can vary.
What Vanilla Bean Paste Is and Why It’s Worth Making
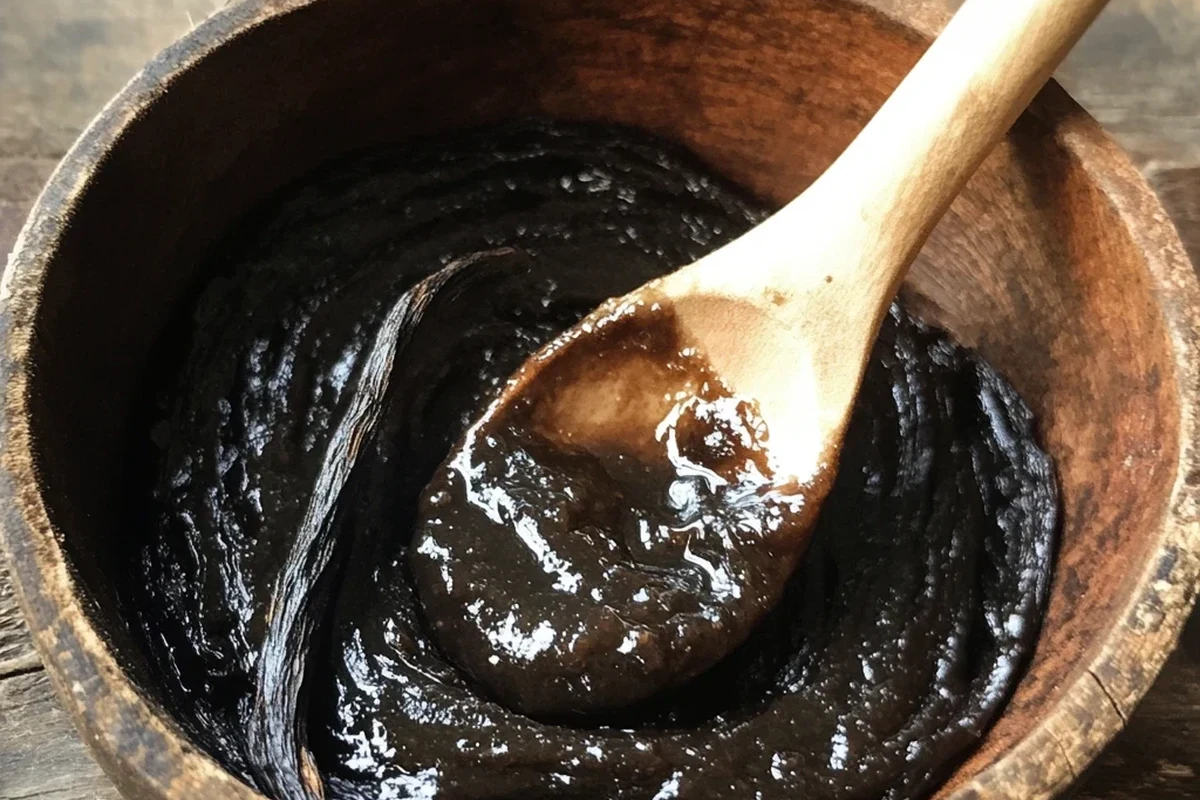
Vanilla bean paste is a thick vanilla mix made from vanilla beans, a sweet liquid, and a binder. It looks fancy, but the idea is simple. You get the flavor of vanilla beans and the easy use of extract in one jar.
For home bakers, that matters. Paste blends into batters and creams fast, yet it still gives you those dark vanilla specks people love in cakes and frostings.
In short: it’s a handy middle ground between whole beans and plain extract.
Vanilla bean paste vs. extract vs. beans
Vanilla extract is thin and easy to pour. It gives strong flavor, but it does not add the speckled look.
Whole vanilla beans give the richest visual effect and a deep aroma. They also take more work, and you usually need to scrape them by hand.
The main difference is texture and convenience. Paste sits in the middle, so it’s easier than beans and more textured than extract.
| Option | Best For | Key Consideration |
|---|---|---|
| Vanilla bean paste | Cakes, frostings, custards | Thick, speckled, easy to measure |
| Vanilla extract | Everyday baking | Smooth flavor, no specks |
| Whole vanilla beans | Showy desserts | More work, higher cost, best aroma |
In short: choose paste when you want both flavor and a pretty finish.
When homemade paste makes sense
Homemade paste makes sense if you bake often. It also helps when you want to use beans that are still soft and fragrant, but not perfect for display.
It can be a good fit if you want to control sweetness, thickness, and bean strength. That’s useful when store-bought paste feels too sweet or too thin for your style.
Results can vary by bean quality, liquid choice, and blender strength. Drier beans may need more soaking time.
What You Need to Make Vanilla Bean Paste
You only need a few ingredients and simple tools. The exact texture will depend on how fine you blend and how much liquid you use.
Core ingredients and their roles
Vanilla beans do the main work. They bring the flavor, aroma, and those familiar black specks.
The sweet liquid helps make the paste thick and spoonable. Many home versions use a simple syrup or a mix that helps the beans blend well.
A binder helps the paste stay together. In many homemade recipes, this role is handled by a thickener or a sugar-heavy base.
For the liquid, choose a food-safe option that suits your recipe goals. A syrup gives a smooth, sweet paste. A small amount of alcohol can help carry flavor and support shelf life, but taste and texture will vary.
Tools that make the process easier
You do not need special gear. Still, the right tools make the job cleaner and faster.
Makes it easier to split beans cleanly.
Helps break down the beans into a smooth paste.
Helps scrape every bit from the bowl.
Keeps the paste easy to store and use.
A narrow blender cup often works better than a wide bowl for small batches.
How to Make Vanilla Bean Paste Step by Step
The process is simple. Split the beans, blend them with your liquid base, and adjust the texture until it looks like thick paste.
Prep the beans and split them cleanly
Cut off any dry tips or damaged spots before you start.
Run a sharp knife down the length of the bean, but do not cut all the way through.
Use the knife tip to pull out the sticky seeds from inside the pod.
Work slowly. Vanilla beans can be soft or dry depending on age, so gentle cutting helps you avoid waste.
In short: clean prep gives you better flavor and fewer tough bits later.
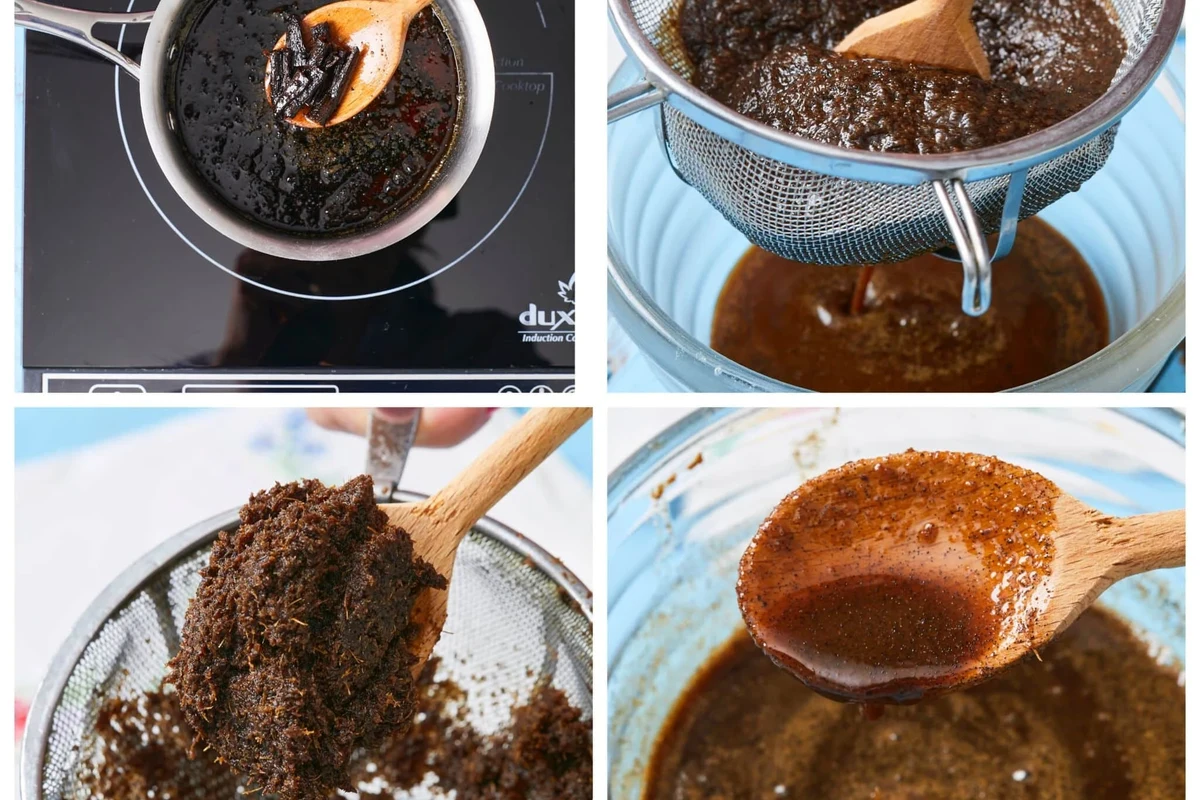
Blend the paste to the right texture
Add the scraped seeds, chopped pods, and your liquid base to a small blender or processor. Blend in short bursts at first.
You want a thick paste, not a runny sauce. The mixture should still hold its shape when you lift it with a spoon.
- Stop and scrape the sides often.
- Blend in short bursts to avoid overheating.
- Add liquid slowly so the paste stays thick.
If the blender struggles, pause and stir. Some machines need more liquid or a longer run time to break down the pods well.
Adjust thickness, sweetness, and flavor
After blending, check the texture. If it feels too stiff, add a little more liquid.
If it feels too loose, add a bit more sweet base or let it sit for a short time. The paste often thickens as it rests.
Taste it carefully if your recipe uses edible ingredients that are safe to sample raw. If the flavor seems flat, you may need stronger beans or a longer soak next time.
- Use soft, fragrant beans.
- Add liquid in small amounts.
- Let the paste rest before judging texture.
- Do not flood the blender with liquid.
- Do not use dry, brittle beans without extra care.
- Do not leave the paste too thin if you want baking use.
How Vanilla Bean Paste Works in Baking and Cooking
Vanilla bean paste works much like extract, but it adds visible specks and a thicker body. That makes it especially nice in recipes where vanilla shows up both in taste and in looks.
Best uses for cakes, cookies, custards, and frostings
Paste shines in buttercream, whipped cream, pastry cream, custards, and ice cream bases. It also works well in cake batter and cookie dough.
For example, a vanilla cake with paste often looks a little richer because the specks show up in the crumb and frosting.
- Strong vanilla flavor in a thick, easy form
- Pretty specks in pale desserts
- Simple swap for many recipes
Use it anywhere you want vanilla to stand out. It can also help when you want a more polished finish without scraping fresh beans every time.
How much to use in place of extract
In many recipes, you can use vanilla bean paste in the same amount as extract. That said, strength can vary by bean quality and recipe style.
If a recipe calls for one teaspoon of extract, start with one teaspoon of paste. If you want a stronger vanilla note, add a little more next time instead of changing the recipe too much at once.
Can I swap paste for extract one for one?
Usually, yes. Start with the same amount, then adjust based on taste and the strength of your beans.
Benefits and Limits of Homemade Vanilla Bean Paste
Homemade paste has real strengths, but it also has limits. Knowing both helps you decide if it fits your kitchen.
Flavor, control, and freshness benefits
You control the sweetness and texture. You also choose the bean quality, which can make a big difference in the final aroma.
Fresh homemade paste can feel more personal than a store jar. If you bake often, that control can be a big plus.
- More control over sweetness and thickness
- Uses your preferred beans
- Works well in many desserts
- Batch quality depends on bean freshness
- Texture may vary from jar to jar
- Takes more prep than extract
Cost, shelf life, and texture limits
Homemade paste may save money for some cooks, but that depends on bean cost and batch size. Vanilla beans can be expensive, so the savings are not always huge.
Shelf life also varies. A paste made with more sugar or alcohol may keep better than one made with more water, but you should always store it safely and check for changes in smell, color, or mold.
Texture is another limit. A home blender may leave tiny bits of pod behind, and that is normal.
If the paste smells off, shows mold, or changes in a bad way, throw it out. When in doubt, do not taste it.
Common Mistakes and How to Avoid Them
Most problems come from dry beans, weak liquid, or overblending. The good news is that each one has a simple fix.
Using dry beans, weak liquid, or the wrong blender
The beans feel tough, and the paste stays grainy.
Soak the beans a little longer, chop them smaller, and use a stronger small blender or processor.
The mixture turns thin and looks more like syrup than paste.
Add more bean material or a thicker sweet base, then blend again in short bursts.
A weak blender can still work, but it may need patience. Stop often and scrape the sides so the blades can catch the bits.
Fixing paste that is too thick or too thin
If the paste is too thick, add a few drops of liquid at a time. Stir or blend again until it loosens.
If it is too thin, add more chopped bean material or let it rest. Some home mixes thicken after sitting in the jar.
Make a small test batch first. It’s easier to adjust one jar than a big bowl.
Storage, Safety, and Cleaning Tips
Good storage helps the paste stay fresh. Clean tools also matter, especially when you work with sticky vanilla seeds.
How to store paste for best quality
Store the paste in a clean, sealed glass jar. Keep it in a cool, dark place unless your recipe or ingredients call for refrigeration.
If you use a water-based version, refrigeration may help quality and safety. If you use alcohol or a high-sugar base, storage can differ, so check your recipe and ingredient plan carefully.
- Use a clean, dry jar
- Label the date made
- Check for changes before each use
In short: store it cleanly, seal it well, and watch for spoilage.
How to keep jars, lids, and tools clean
Wash the jar, lid, knife, and blender parts with hot soapy water after use. Rinse well and let everything dry fully before storing.
Sticky vanilla paste can cling to corners, so pay attention to seams and blade edges. Follow the appliance manual if your blender parts have special care rules.
Wash tools right away so the paste does not dry hard.
Check jars, lids, and blender seals for wear or residue.
Follow the appliance manual and stop using damaged equipment.
Final Recommendation: Is Homemade Vanilla Bean Paste Right for You?
Homemade vanilla bean paste is worth making if you bake often and want more control. It’s a good fit when you care about flavor, specks, and a more custom result.
Who should make it at home
Make it at home if you enjoy small kitchen projects and want to use your own bean choice. It also makes sense if you like adjusting sweetness and thickness for your desserts.
It’s a practical choice for bakers who want a jar ready for cakes, frostings, and custards.
When buying ready-made paste may be the better choice
Buy ready-made paste if you want convenience, long shelf life, and a more predictable result. That can be the better move if you bake only once in a while.
It also helps when you do not want to watch for texture changes or manage storage details yourself.
Homemade vanilla bean paste is a smart, flexible option for regular bakers who want rich flavor and visible specks. If you want the easiest path, or you bake rarely, a good store-bought paste may be the simpler choice.
- Paste gives you bean flavor with easy measuring.
- Use soft beans and add liquid slowly.
- It works best in cakes, custards, and frostings.
- Store it cleanly and check for spoilage.
Frequently Asked Questions
The active prep is usually quick, but texture can vary with bean dryness and blender power. A short resting time can also help the paste thicken.
Yes, in many recipes you can swap it one for one. Start with the same amount, then adjust next time if you want a stronger vanilla taste.
Add a little liquid at a time and stir or blend again. Go slowly so you do not turn it into syrup.
Add more chopped bean material or a thicker sweet base. Let it rest before judging the final texture.
Store it in a clean, sealed glass jar and keep it in a cool, dark place or refrigerate if your recipe calls for it. Check for smell, mold, or other spoilage before each use.
It works very well in cakes, cookies, custards, frostings, whipped cream, and ice cream bases. It is especially useful when you want visible vanilla specks.