How to Open Electric Milk Frother Safely and Easily
Unplug the frother, let it cool, and open it gently with the correct motion. If it stays stuck, clean the rim and stop using it when parts look damaged.
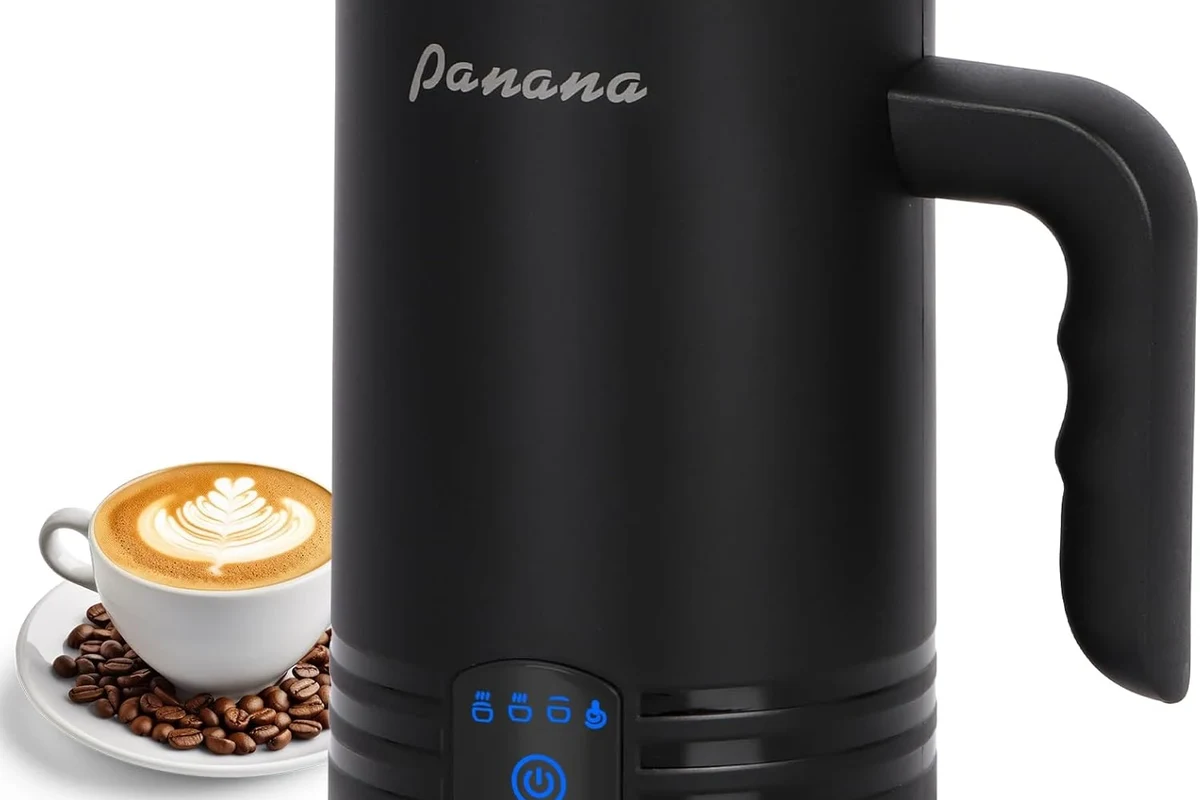
If you’re trying to figure out how to open electric milk frother parts without breaking them, the safest answer is simple. Unplug it, let it cool, and check the manual first. Most frothers open with a twist lid, a lift-off cover, or a removable whisk, but the exact design depends on the model.
In many cases, a stuck lid or tight seal comes from dried milk, steam pressure, or a misaligned part. You usually do not need force. A careful reset, light cleaning, and the right opening motion solve most problems.
- Cool first: Heat and steam can make the lid hard to open.
- Use the right motion: Twist, lift, or unlatch only as the manual says.
- Clean buildup: Dried milk often causes stuck lids and tight seals.
- Don’t force it: Cracks, bent clips, and electrical damage need caution.
- Check care rules: Dishwasher safety and removable parts vary by model.
How to Open Electric Milk Frother Safely and Easily
Quick answer for stuck lids, whisks, and lids that won’t budge
Start by unplugging the frother and waiting until it cools. Then check whether the lid twists, lifts, or locks in place.
If the lid feels stuck, don’t yank it. Wipe the rim, loosen any dried foam, and try a gentle twist while keeping the base steady.
Follow the appliance manual and stop using damaged equipment.
If the whisk will not come out, look for a clip, magnetic mount, or simple pull-fit design. Never pry near the motor base or electrical contacts.
Why electric milk frothers can feel hard to open
Milk frothers often seal tightly so heat and foam stay inside. That helps the drink, but it can make the lid feel snug after use.
Dried milk is another common cause. It builds up around the rim, the whisk, and the lid edge, which can make parts stick.
Some models also use safety locks. These locks stop spills, but they can feel stiff when you try to open them fast.
Opening methods vary by brand and model. Always check the user manual before you try anything new.
How an Electric Milk Frother Works
Main parts you need to know before opening it
Most frothers have a few basic parts. Once you know them, opening the unit makes more sense.
Helps hold heat and keep foam from splashing out.
Spins milk into foam or warms it with movement.
Holds the milk while the machine works.
Contains the motor, heat parts, or battery section.
The lid usually opens first. After that, you can remove the whisk or lift out the jug, if the design allows it.
Manual, battery, and plug-in frother designs
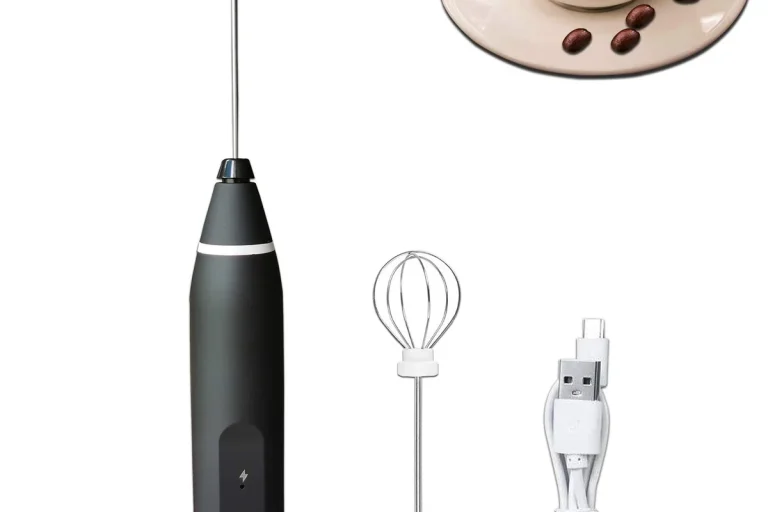
Manual frothers open like small pitchers. You usually remove the plunger top and clean the inner mesh by hand.
Battery frothers often have a simple whisk wand. The whisk may pull off for cleaning, but the motor end should stay dry.
Plug-in frothers are the most varied. Some have a removable jug, while others have a fixed heating base and a lift-off lid.
Many frother lids are designed to release steam slowly. That helps reduce splatter when you open them.
Step-by-Step Guide to Opening the Frother
Before you start: unplug, cool down, and check for pressure
First, turn the frother off and unplug it. If it uses batteries, switch it off and remove the batteries only if the manual says to do so.
Wait until the unit feels cool. Hot milk and steam can burn your hands, even when the outside looks safe.
Look at the lid before opening. If you see steam, bubbling, or a tight seal, give it a little more time.
How to open the lid without damage
Keep one hand on the frother so it does not slip.
See whether the lid twists, lifts, or snaps open.
Turn or lift slowly. Stop if the lid resists hard.
Wipe away milk residue before trying again.
If the lid has a latch, press it fully before lifting. If it twists, use a short, firm turn instead of a hard pull.
For a lid that sticks, warm water on a cloth can help loosen dried milk. Keep water away from the power base and any cord opening.
How to remove the whisk, jug, or inner parts
Many frothers use a small whisk that sits on a spindle or magnetic holder. Pull it straight off if the manual says it is removable.
If the whisk feels stuck, do not twist hard. A gentle side-to-side wiggle often works better than force.
Some jugs lift out from the base for cleaning. Others stay fixed, so only the lid and whisk should come off.
- Take a photo before removing parts, so reassembly is easier.
- Check for tiny seals or clips before washing anything.
- Dry parts fully before putting the frother back together.
Common Problems and How to Fix Them
Stuck lid or tight seal
A stuck lid often means milk dried around the edge. It can also mean the lid is locked in the wrong position.
The lid won’t lift or twist, even with light pressure.
Wipe the rim, check the lock mark, and try again after cooling.
If the lid still will not move, stop. Forcing it can crack the plastic or bend a clip.
Milk residue, dried foam, or buildup
Dried foam can glue the lid, whisk, and rim together. This is common after sweet drinks or thicker milk.
Soak removable parts in warm, soapy water if the manual allows it. Then use a soft sponge to lift the residue.
White film or crusty foam appears around the opening.
Soak removable parts and wipe the seal area after every use.
Misaligned parts, broken clips, or worn seals
Sometimes the frother opens fine, but it won’t close or lock again. That usually means something is out of line.
Check whether the whisk sits flat and the lid lines up with its marks. If a clip looks bent or a seal looks cracked, the part may need replacement.
Do not use a frother with a cracked lid, loose seal, or damaged base.
Safety Tips You Should Never Skip
Heat, steam, and electrical safety basics
Hot milk can splash when you open the frother. Open the lid slowly and keep your face and hands clear.
Never wash the base unless the manual says it is safe. Most electrical parts should stay dry.
If the cord, plug, or base looks damaged, stop using the appliance right away. Electrical faults are not worth the risk.
When not to force the frother open
Do not force the lid if steam is still building inside. Wait a few minutes and try again.
Do not pry with knives, forks, or metal tools. They can crack the plastic and leave sharp edges.
If the lid or whisk seems jammed by a broken part, stop and inspect it. Forcing it can make the problem worse.
Signs the frother needs repair or replacement
Some problems are bigger than a stuck lid. If you see these signs, it may be time to replace the unit.
- The motor makes odd sounds or stops suddenly.
- The lid no longer fits tightly or keeps popping off.
- The whisk wobbles, bends, or won’t stay attached.
- The base gets unusually hot or smells burnt.
When in doubt, check the warranty and contact the maker. That is safer than trying to fix electrical parts at home.
Cleaning and Maintenance After Opening
How to clean the lid, whisk, and container
Clean the frother soon after use. Fresh milk wipes away much easier than dried milk.
Wash removable parts with warm water and mild soap if the manual allows it. Use a soft cloth or non-scratch sponge.
Dry every part well before reassembly. Moisture left behind can cause smells or make parts stick again.
What parts can go in the dishwasher
Dishwasher safety varies by model. Some lids, whisks, and jugs can go in the top rack, while others cannot.
Check the manual before you load anything. If the maker does not say it is dishwasher safe, hand-wash it instead.
Heat from a dishwasher can warp some plastic parts. When in doubt, hand-wash to protect the fit.
How to keep the frother easier to open next time
Wipe the rim right after each use. That small habit prevents most lid problems.
Do a deeper clean once in a while, especially if you use sugar, syrup, or thicker milk. Those ingredients leave more buildup.
Rinse or wipe all removable parts and dry them fully.
Check the seal, whisk, and lid for residue or wear.
Inspect clips, fits, and any signs of cracks or looseness.
What to Look for in a Good Electric Milk Frother
Build quality, seal design, and ease of use
If you are buying a new frother, opening ease matters more than many shoppers expect. A good lid should feel secure, but not stubborn.
Look for parts that line up clearly. Clear marks and simple locks make opening and closing less frustrating.
Capacity, power, and frothing settings
Capacity affects how often you need to open the lid. A bigger jug may suit more drinks, but it also takes more counter space.
Settings matter too. Some frothers only heat and foam. Others offer hot foam, cold foam, or simple warming modes.
Best for one or two drinks and quick cleanup.
Best for larger batches and fewer refill steps.
Value for money and long-term care
Good value is not just about price. It also includes how easy the frother is to clean, open, and keep in shape.
A model with removable parts and clear care instructions often saves time later. That can matter more than extra features you rarely use.
- Check how the lid opens and locks.
- Confirm which parts are removable.
- Read cleaning and dishwasher instructions.
- Review warranty terms and safety notes.
Final Verdict: When to Open It Yourself and When to Get Help
Best choice for home users
For most home users, the best move is simple care, not force. Unplug the frother, let it cool, clean the rim, and open it with the correct motion.
If the lid, whisk, or jug comes apart easily, that usually means the design is working as intended. Careful cleaning keeps it easy to open next time.
When a replacement or service makes more sense
If the frother has a cracked lid, loose seal, burnt smell, or electrical fault, stop using it. Those are signs the problem is bigger than a stuck part.
In those cases, check the manual, contact the maker, or replace the unit. That is the safest choice for your kitchen.
Open an electric milk frother with patience, not force. Most problems come from residue, heat, or a tight seal, and careful cleaning usually solves them. If the unit shows damage or electrical trouble, stop using it and get help.
Frequently Asked Questions
A stuck lid usually comes from dried milk, a tight seal, or steam pressure. Let the frother cool, wipe the rim, and try the correct opening motion from the manual.
No, forcing it can crack the lid or bend a clip. If it still will not move after cooling and cleaning, stop and inspect the parts.
Wash removable parts with warm water and mild soap if the manual allows it. Dry everything fully before putting the frother back together.
That depends on the model. Check the manual, because some lids, whisks, and jugs can go in the dishwasher while others should be hand-washed.
Stop using it if you see a cracked lid, loose seal, burnt smell, or electrical damage. Those signs can point to a safety issue or a failing part.
Wipe the rim after each use and clean dried milk before it builds up. Keeping the parts dry and aligned also helps the lid open more smoothly.