Top Toaster Tips for Homemade Bread to Perfect Every Slice
Toasting homemade bread can be tricky, but with the right tips, you can achieve perfectly crisp and evenly browned slices every time. This guide shares essential toaster tips for homemade bread, helping you enjoy your fresh loaves with the ideal texture and flavor.
Key Takeaways
- Use the right toaster settings: Adjust heat levels to avoid burning or under-toasting homemade bread.
- Slice thickness matters: Thicker slices need different toasting times than thinner ones for an even finish.
- Prepping the bread helps: Lightly butter or mist the bread to enhance crispness and flavor.
- Know your bread type: Different breads toast uniquely—adjust techniques for sourdough, whole wheat, or gluten-free varieties.
- Avoid toaster mishaps: Keep your toaster clean and follow safety tips to prevent fires or damage.
- Reheat wisely: Use gentle heat settings or methods if toasting previously frozen or refrigerated bread.
- Experiment and observe: Each toaster and bread combination is unique—trial and error leads to perfection.
📑 Table of Contents
Introduction
There’s something truly comforting about homemade bread. From the aroma filling your kitchen to the satisfying texture of a freshly baked slice, homemade bread is a delight. But when it comes to toasting that bread, many people find themselves frustrated—too burnt, too soggy, or unevenly toasted slices can spoil the experience.
Luckily, toasting homemade bread doesn’t have to be a guessing game. With a few simple tips and tricks, you can enjoy perfectly toasted slices that bring out the best in your homemade loaves. Whether it’s a rustic sourdough or a soft sandwich bread, mastering the toaster can elevate your breakfast or snack to new heights.
In this guide, we’ll share top toaster tips for homemade bread to help you perfect every slice. From selecting the ideal toaster settings to prepping your bread before toasting, you’ll find practical advice to make your toaster work for you—not against you.
Understanding the Unique Nature of Homemade Bread
Why Homemade Bread Toasts Differently
Homemade bread is often denser and moister than store-bought varieties. This is because it lacks preservatives and sometimes contains more natural ingredients like whole grains, seeds, or added moisture. These factors influence how it responds to heat in a toaster.
For example, a thick slice of homemade sourdough may toast unevenly if the heat is too high or the slice is too thick. On the other hand, a soft, airy white bread might burn quickly if the toaster setting is too hot. Understanding these nuances is key to perfect toasting.
The Impact of Thickness and Moisture Content
Thickness plays a major role in toasting homemade bread. Thicker slices need more time to heat through without burning the exterior. Moisture content also affects toasting time—wetter bread can steam inside the toaster, leading to soggy results rather than crisp ones.
Here’s a simple test: try slicing your bread thinner and thicker, then toast both to see how your toaster handles each. This experimentation helps tailor your approach for your specific bread type.
Choosing the Right Toasting Settings
Adjusting Heat Levels for Homemade Bread
Most toasters come with numbered settings from light to dark. For homemade bread, start with a medium-low setting (usually 2-3) and adjust upwards if needed. This prevents burning the crust while allowing the inside to warm and crisp up.
If you notice your bread is browning too fast, lower the setting. If it’s too soft or pale, increase it slightly. The goal is a golden, crunchy exterior with a warm, tender inside.
Use of Toaster Modes and Features
Many modern toasters offer specialized modes like “bagel,” “defrost,” or “reheat.” These can be handy for homemade bread depending on its state:
- Bagel mode: Toasts one side more than the other, useful if your bread has a thick crust on one side.
- Defrost mode: Ideal for frozen homemade bread. For more on using frozen bread in a toaster, check out our guide on toasting frozen bread.
- Reheat mode: Gently warms bread without additional browning, perfect for day-old slices.
Prepping Homemade Bread for Toasting
Light Buttering or Oiling
Applying a thin layer of butter or olive oil before toasting can improve flavor and crispness. It creates a barrier that helps the heat distribute evenly and adds a delicious golden finish. Just be sure not to overdo it, as excess fat can cause smoke or mess inside the toaster.
Using Moisture Wisely
If your homemade bread is slightly stale or dry, lightly misting it with water before toasting can help revive softness inside while crisping the outside. Use a spray bottle for an even, light application, then toast immediately.
Knowing What Not to Do
Avoid buttering your bread before toasting if your toaster isn’t designed for it, as melted butter can drip inside. Also, don’t use flammable spreads or toppings in the toaster. For more safety tips, our guide on buttered bread in toasters explains best practices.
Toasting Techniques for Different Bread Types
Sourdough Bread
Sourdough often has a thick crust and chewy interior. Toast it on a medium setting to get a crisp crust without drying out the chewy center. For thick slices, consider toasting twice on a lower setting rather than once on high.
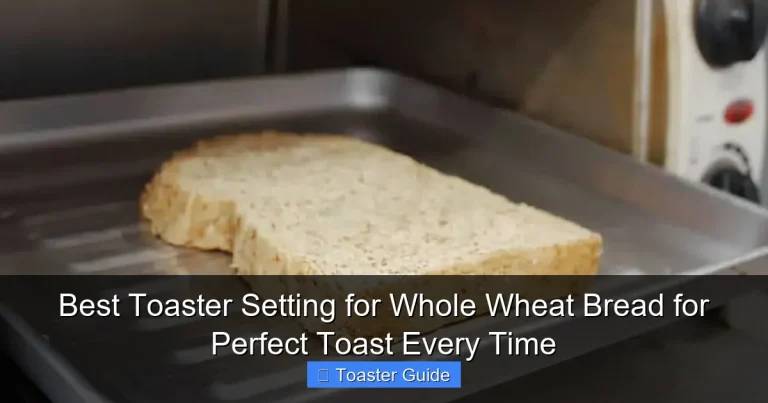
Whole Wheat and Multigrain
These breads can contain seeds or nuts that brown quickly. Use a lower heat setting and watch closely to avoid burning. Toasting on “bagel mode” can help if the crust is uneven.
Soft White or Sandwich Bread
These breads toast faster due to their softer texture. Start on a light setting and increase if needed. Thinner slices toast quickly, so monitor closely.
Gluten-Free Bread
Gluten-free breads often dry out quickly. Use the reheat function or a low setting to warm gently without over-toasting. Applying a light butter or oil can help maintain moisture.
Maintaining Your Toaster for Best Results
Regular Cleaning
Crumbs and residue can affect toasting quality and even cause fires. Empty your toaster crumb tray regularly and wipe down the interior carefully. For detailed cleaning tips, our toaster cleaning guide offers easy steps to keep your appliance in top shape.
Check for Uneven Toasting
If your toaster toasts unevenly, it might need adjustment or repair. Sometimes bread placement inside the slots makes a difference. Try rotating slices halfway through or using a different slot to compare. For troubleshooting tips, see our uneven toaster fix guide.
Safe Use Practices
Always unplug your toaster when not in use and avoid inserting metal objects to prevent damage or shocks. Follow safety guidelines to prevent accidents and fires. For more safety advice, our toaster safety tips are a must-read.
Extra Tips for Perfect Toast Every Time
Experiment with Toasting Times
Since each toaster and bread type varies, keep notes on what works best. Try different settings and slice thicknesses to find your perfect combination.
Toast in Batches
For consistent results, toast one or two slices at a time. Overloading toaster slots can cause uneven heating.
Complement Your Toast
Consider adding toppings like fresh butter, jam, or avocado after toasting to enhance flavor and texture.
Conclusion
Toasting homemade bread to perfection is all about understanding your bread, adjusting your toaster settings, and using a few smart prep techniques. With these top toaster tips for homemade bread, you can enjoy golden, crispy, and delicious slices that bring your fresh loaves to life.
Remember, practice makes perfect—so don’t hesitate to experiment with your toaster and bread types. Keep your toaster clean and safe, and you’ll be savoring perfect toast every morning. For more toaster tips and safety advice, explore our related guides to keep your kitchen adventures effortless and enjoyable.
Frequently Asked Questions
Can I toast frozen homemade bread directly in the toaster?
Yes, you can toast frozen homemade bread directly, but it’s best to use the defrost setting if your toaster has one. This allows the bread to thaw and toast evenly without burning the outside. For more detailed tips, see our guide on toasting frozen bread.
Should I butter my homemade bread before or after toasting?
It depends on your toaster and preference. Lightly buttering before toasting can enhance crispness and flavor but may cause drips or smoke if overdone. Many prefer to toast first, then add butter for a softer texture. Check our article on buttered bread in toasters for safety tips.
How can I avoid uneven toasting on homemade bread?
Ensure slices are evenly cut and fit properly in toaster slots. Adjust toaster settings to medium heat and toast in batches if needed. Rotating slices midway can help. For troubleshooting, visit our uneven toaster fix guide.
Is it safe to toast thick slices of homemade bread?
Yes, but thick slices require lower heat settings or multiple toasting cycles to avoid burning the crust while warming the inside. Monitor closely and adjust settings as needed.
What are the best toaster settings for gluten-free homemade bread?
Gluten-free bread can dry out quickly, so use a low heat or reheat setting to warm it gently without over-toasting. Lightly buttering before toasting can help retain moisture.
How often should I clean my toaster when regularly toasting homemade bread?
Clean your toaster crumb tray after every few uses to prevent buildup and potential fire hazards. Wipe down the exterior regularly. Our detailed toaster cleaning guide can help maintain your appliance.