Rice to Water Ratio in a Rice Cooker for Perfect Rice
The best rice to water ratio in a rice cooker depends on the rice type, but a good starting point for white rice is usually about 1:1.25 to 1:1.5. Brown rice, specialty grains, and different cooker settings may need more water or a longer cook time.
Getting the rice to water ratio in a rice cooker right is the fastest way to move from dry or gummy rice to a consistent, fluffy result. In 2026, the best answer is still not one single ratio for every grain or cooker, but a reliable starting point you can adjust for texture, rice type, and the model you own.
- Start simple: White rice often works at 1:1.25 to 1:1.5.
- Adjust by grain: Brown rice and blends usually need more water.
- Measure consistently: Use one cup system and drain rinsed rice well.
- Match the setting: White, brown, quick cook, and porridge modes are not interchangeable.
- Fine-tune slowly: Change water in small steps for better texture control.
Understanding the Rice to Water Ratio in a Rice Cooker: What Searchers Really Want in 2026
Most people searching for the rice to water ratio in a rice cooker want one thing: a dependable method that works without guesswork. That usually means a ratio they can use tonight, plus a simple way to fine-tune it next time.
How this guide helps beginners, home cooks, and meal-prep users get consistently fluffy rice
If you are new to rice cookers, the biggest challenge is not cooking rice itself. It is knowing how much water to use when the grain, cooker, and batch size all change the result.
For meal prep, consistency matters even more. A small adjustment of a few tablespoons can mean the difference between rice that reheats well and rice that turns mushy by day two.
Why the “right ratio” depends on rice type, rice cooker style, and desired texture
Different rice types absorb water differently. White rice usually needs less water than brown rice, while sticky or sushi-style rice often needs a texture-specific approach.
The rice cooker itself also matters. Basic switch cookers, fuzzy logic models, and induction cookers can all finish rice differently, even when the measured ratio looks the same.
Standard Rice to Water Ratios for Rice Cookers by Rice Type
These ratios are useful starting points, not hard rules. Package instructions should always win if they differ significantly, especially for specialty grains or blended products.
White rice: long-grain, medium-grain, and short-grain baseline ratios
For many rice cookers, white long-grain rice starts around 1 cup rice to 1.5 cups water. Medium-grain and short-grain white rice often do well closer to 1:1.25 to 1:1.5, depending on how soft you like the texture.
If you want firmer rice for stir-fries or grain bowls, use slightly less water. If you prefer softer rice for side dishes, add a small amount more rather than making a large jump.
Brown rice: why it needs more water and a longer cook time
Brown rice has the bran layer intact, so it absorbs water more slowly and needs a longer cooking cycle. A common starting point is about 1 cup brown rice to 2 cups water, though some cookers and brands may need a little more.
Because brown rice is less forgiving, the soak time and cooker setting matter more here than with white rice. If your cooker has a brown rice mode, use it.
Jasmine, basmati, sushi rice, and sticky rice: texture-specific adjustments
Jasmine rice often cooks well with a slightly lower water ratio than many standard white rice guides, since it is naturally soft and fragrant. Basmati usually benefits from a little less water for separate, fluffy grains.
Sushi rice needs enough water to become tender and slightly sticky, but not wet. Sticky rice and glutinous rice are a different category and often require soaking and steaming-style methods rather than a standard white-rice ratio.
Parboiled, wild rice blends, and specialty grains: when package instructions override the default
Parboiled rice often needs less water than brown rice but more than standard white rice. Wild rice blends and grain mixes are even more variable, since each component absorbs water differently.
For these products, the package instructions are usually the safest starting point. If the blend includes lentils, quinoa, or other grains, the cooker setting may matter as much as the ratio.
How to Measure Rice and Water Correctly in a Rice Cooker
Even a good ratio fails if the measurement method is inconsistent. The most common mistakes come from mixing cup sizes, rinsing without accounting for water, or overfilling the pot.
Using the cooker’s measuring cup versus standard kitchen cups
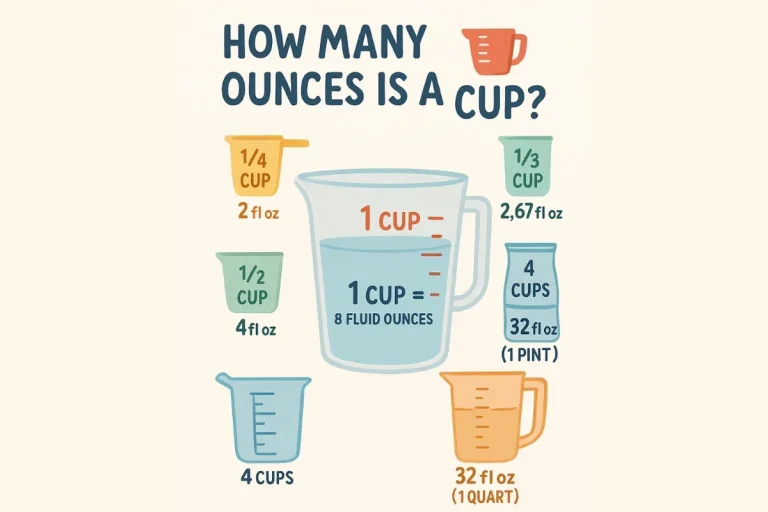
Many rice cookers include a smaller measuring cup that is not the same as a standard 8-ounce kitchen cup. Using the wrong cup can throw off the ratio before the rice even starts cooking.
To stay consistent, use the cup that came with the cooker, or measure everything with standard kitchen tools and keep the system the same every time.
Rinsing rice and how leftover surface water changes the final ratio
Rinsing removes excess surface starch, which can improve texture and reduce clumping. But if the rice is not drained well, extra water clinging to the grains can slightly increase the final liquid amount in the pot.
That does not mean you should skip rinsing. It just means you should drain thoroughly and use the same rinsing routine every time so your results stay repeatable.
Leveling, stirring, and avoiding overfilling the inner pot
Measure rice level, not heaped. A rounded cup can add enough extra grain to change the final texture, especially in smaller cookers.
After adding water, a gentle swirl is enough for most white rice. Avoid aggressive stirring, which can release more starch and make the rice denser.
Step-by-step setup for achieving repeatable results
First, measure the rice with the same cup each time. Rinse if desired, drain well, then add the correct water amount for the rice type and cooker setting.
Use the cooker cup or a standard cup system, but do not mix both methods in the same batch.
Rinse until the water is less cloudy, then let excess water drain before measuring the final liquid.
Pour in the measured water, level the rice gently, and make sure the pot is not overfilled.
Choose white, brown, quick cook, or porridge mode based on the grain and texture you want.
Rice Cooker Type, Size, and Settings: Why One Ratio Does Not Fit Every Model
Two rice cookers can use the same ratio and produce different results. Heat distribution, sensor design, and steam release all affect how much water remains by the end of the cycle.
Basic switch cookers vs. fuzzy logic and induction rice cookers
Basic switch cookers are simple and dependable, but they usually need more careful ratio control because they do not adjust as intelligently during cooking. Fuzzy logic and induction models may compensate better for small differences in rice or water.
That said, smarter cookers are not magic. They still need the right grain, a clean pot, and the correct setting to perform well.
Small 3-cup units, family-size 5-10 cup models, and batch scaling
Small rice cookers can be less forgiving because a small measurement error becomes a bigger percentage of the total batch. Family-size models are usually more flexible, but they can still overflow if overfilled.
When scaling up, keep the same ratio instead of guessing. If a recipe works for 2 cups of rice, it should usually scale cleanly to 4 cups as long as the cooker capacity allows it.
“White rice,” “brown rice,” “quick cook,” and “porridge” settings explained
White rice mode is typically the default for standard polished rice. Brown rice mode usually extends cook time and may use more aggressive heating to fully soften the bran layer.
Quick cook often shortens the process and can leave rice a little firmer if the ratio is not adjusted. Porridge settings use much more water and are not meant for ordinary fluffy rice.
When to adjust water for nonstick inner pots, steam vents, and altitude
Nonstick inner pots can cook a bit more evenly, but they do not eliminate the need for the right ratio. Steam vent design also affects how much moisture escapes during the cycle.
At higher altitude, water boils at a lower temperature, so cooking can take longer. Some households need a small water increase or a longer rest period to get the same result.
Common Mistakes That Throw Off the Rice to Water Ratio
Most rice problems are ratio problems, but not always in the way people expect. A bad batch may come from over-rinsing, the wrong cup, or a cooker that was not set correctly.
Too much water: mushy rice, overflow, and starchy boil-over
Too much water creates soft, sticky rice that can collapse into a paste. In some cookers, it can also cause boil-over through the vent or lid seam.
If this happens often, reduce the water slightly and check whether you are using the correct measuring cup. A small change is usually better than a large correction.
Too little water: dry centers, scorching, and uneven texture
Too little water can leave the center undercooked while the bottom layer scorches. This is especially common with brown rice and larger batches.
If the rice comes out dry, add a little more water next time and allow a short rest after cooking. Resting helps the grains finish absorbing steam.
Ignoring rice age, soak time, or rinse water
Older rice often needs a touch more water than fresh rice because it has dried out in storage. Soaked rice may need less water, depending on how long it sat before cooking.
Rinse water matters too. If you do not drain the rice well, you may accidentally add extra moisture and blame the ratio when the issue is really the prep method.
Using the wrong cup size or mixing measurement systems
One of the easiest mistakes is using a standard kitchen cup for rice and the cooker cup for water, or the other way around. That makes the ratio meaningless.
Pick one system and stick to it. Consistency matters more than the exact measuring tool as long as the same method is used every time.
Practical Time, Cost, and Convenience Comparison for Home Cooking
Rice cookers are popular because they reduce attention, not because they eliminate the need for good technique. The ratio still matters, but the appliance makes it easier to repeat success.
Rice cooker vs. stovetop: hands-off convenience, cleanup, and consistency
A rice cooker is usually more hands-off than stovetop rice. You measure, start the cycle, and let the machine manage heat and timing while you focus on the rest of dinner.
Stovetop cooking can work very well, but it often requires more monitoring. For busy households, the rice cooker usually wins on convenience and consistency.
How ratio mistakes affect food waste and grocery cost over time
A single bad batch may not seem expensive, but repeated waste adds up. If rice is a weekly staple, even small measurement errors can affect your grocery budget over time.
Getting the ratio right also reduces the need to rescue undercooked rice or throw out mushy leftovers. That saves both time and ingredients.
Best situations for batch cooking, leftovers, and meal prep in 2026
Rice cookers are especially useful for meal prep because they handle larger batches with little supervision. In 2026, many home cooks use them for grain bowls, lunch boxes, and freezer-friendly portions.
If you plan to store rice, cool it quickly and refrigerate it promptly. The best ratio still needs safe handling after cooking.
Safety and Care Notes for Better Rice Cooker Results
Rice cookers are generally simple appliances, but they still deserve basic care. Good handling prevents boil-overs, protects the nonstick pot, and keeps the unit working longer.
Preventing boil-overs, steam burns, and lid/vent blockages
Never fill the cooker beyond the marked maximum line. Overfilling can cause starch foam to block the vent or push hot liquid out of the lid area.
Open the lid carefully after the cycle ends, because steam can escape fast. Keep the vent clean so pressure and moisture can release normally.
Keeping the inner pot coating safe and scratch-free
Use wooden, silicone, or plastic utensils if the pot has a nonstick surface. Metal tools can scratch the coating and make cleanup harder over time.
Wash the pot gently and avoid abrasive pads unless the manufacturer specifically says they are safe.
Cleaning residue, measuring cups, and condensation traps after each use
Rice starch can collect on the lid, rim, and steam cap. Cleaning these areas after each use helps the cooker stay accurate and prevents off odors.
Also wash the measuring cup and wipe moisture from the exterior. Small maintenance habits make the ratio more reliable because the cooker performs more consistently.
When a malfunctioning cooker needs replacement instead of another ratio adjustment
If rice keeps coming out inconsistent even when your measurements are correct, the issue may be the cooker itself. A failing heating plate, damaged sensor, or worn lid seal can change performance.
When the appliance no longer heats evenly or shows repeated electrical problems, replacement is often safer than endlessly changing the ratio. For serious electrical faults, stop using the unit and have it checked by a qualified appliance technician.
Final Recap: The Easiest Way to Master Rice to Water Ratio in a Rice Cooker
The most reliable way to master the rice to water ratio in a rice cooker is to start with a sensible baseline, then make small adjustments based on the grain and your preferred texture. Most cooks get better results by changing water in small steps instead of chasing a perfect universal number.
Quick summary of the most reliable starting ratios by rice type
White rice often starts around 1:1.25 to 1:1.5, depending on grain length and texture preference. Brown rice commonly starts around 1:2, while specialty grains should follow package guidance first.
How to fine-tune texture for softer, firmer, or stickier rice
For softer rice, add a little more water or allow a short rest after cooking. For firmer rice, reduce water slightly and keep the lid closed during the resting period.
If you want stickier rice, choose the correct grain type instead of overwatering standard rice. Texture is easier to control when the grain and setting match the goal.
Key takeaways for consistent results in any rice cooker model
Use the same measuring system every time, rinse and drain consistently, and choose the right setting for the grain. Those three habits solve most rice problems before they start.
Once you find the right starting ratio for your cooker, write it down. That simple note can save time, money, and frustration on every future batch.
Frequently Asked Questions
A common starting point for white rice is about 1 cup rice to 1.25 to 1.5 cups water. Brown rice usually needs more, often around 1:2, depending on the cooker and grain.
Rinsing is optional for some dishes, but it helps remove excess starch and can improve texture. If you rinse, drain the rice well so extra surface water does not throw off the ratio.
Mushy rice usually means there is too much water, the wrong cup was used, or the cooker setting was not matched to the grain. A small reduction in water often helps.
Not always, because basic switch cookers, fuzzy logic models, and induction cookers can heat differently. The best ratio still depends on the cooker style, rice type, and desired texture.
Add a little more water next time and make sure the lid stays closed during the resting period. Dry rice can also happen if the cooker cycle ends too soon or the rice is older.
If the cooker keeps giving inconsistent results even with correct measurements, the appliance may have a heating or sensor problem. Repeated electrical issues or damaged parts are a good reason to stop using it and consider replacement.