Rice Water Ratio Cooker Guide for Perfect Rice Every Time
The best rice water ratio cooker method starts with the right ratio for your rice type, then stays consistent with measuring, rinsing, and resting. Small adjustments based on cooker model and grain type usually make the biggest difference.
If you are searching for a rice water ratio cooker guide in 2026, you probably want one thing: a simple way to make rice come out right without guessing. The good news is that the best ratio depends on the rice type, the cooker style, and how you measure, but the method is easy once you know the basics.
- Start simple: Use a baseline ratio for your rice type, then adjust in small steps.
- Measure consistently: Use the same cup system every time for repeatable results.
- Rinse and drain: Extra surface water can change the final texture.
- Respect the cooker: Do not exceed the max fill line or open the lid too early.
What “Rice Water Ratio Cooker” Means and What Readers Are Looking For in 2026
In practical terms, “rice water ratio cooker” means the relationship between rice, water, and the cooker you use. Most readers are not looking for theory; they want a fast ratio, a reliable setting, and a result that is fluffy, tender, and not sticky unless sticky rice is the goal.
Search intent: quick ratio answers, cooker settings, and foolproof rice results
By 2026, people expect quick answers that work across common kitchen appliances. That usually means a clear chart, a reminder about rinsing, and a few adjustments for brown rice, jasmine, basmati, and mixed grains.
It also means the guide should be honest about limitations. A rice cooker is helpful, but the exact result can vary by brand, model, rice age, water hardness, altitude, and how tightly the lid seals.
How this guide fits RedKitchenProject’s water ratio and measurement category
RedKitchenProject focuses on practical measurement advice, so this article is built around ratios, cups, and repeatable methods. The goal is to help you measure correctly before cooking, not to overcomplicate a simple kitchen task.
If you have ever had rice turn mushy one day and dry the next, the issue is often measurement, not the cooker itself. Small changes in rinse level, soak time, or cup type can make a noticeable difference.
Rice Cooker Types and Why the Ratio Changes by Model
Not all rice cookers behave the same way. Some are basic on/off machines, while others use sensors and temperature control to adjust cooking as the rice absorbs water.
Standard electric rice cookers vs. fuzzy logic cookers
Standard electric rice cookers usually work best with a fixed ratio and a simple cook cycle. They are dependable, but they do not adapt much if your rice is older, rinsed heavily, or a little different from the last batch.
Fuzzy logic cookers are more flexible. They can adjust heat and time during cooking, which may improve texture, but the ratio still matters because the machine can only do so much if the starting measurement is off.
Microwave rice cookers and stovetop-style cooker pots
Microwave rice cookers often need a slightly different ratio because microwave heating is fast and uneven compared with electric cookers. Stovetop-style cooker pots also behave differently because evaporation is higher and the cook has more direct control.
If you switch between cooker styles, do not assume the same water level will always work. The safest approach is to start with the ratio recommended for that specific method and adjust in small steps.
Small, medium, and family-size cooker capacity considerations
Capacity matters because a cooker that is nearly empty may behave differently from one filled close to its limit. Small batches can dry out faster, while large batches may need more careful rinsing and stirring after cooking.
Always respect the max fill line. Overfilling can cause boil-over, uneven cooking, and a messy steam vent, especially with starchier rice varieties.
The Core Rice Water Ratio Chart for Common Rice Varieties
The chart below gives a practical starting point. Treat it as a baseline, then fine-tune by brand, cooker style, and whether you rinse or soak the rice.
White rice: long-grain, medium-grain, and short-grain ratios
For many standard rice cookers, long-grain white rice often works well at about 1 cup rice to 1.25 cups water. Medium-grain white rice may do better around 1 cup rice to 1.33 cups water, while short-grain white rice often sits closer to 1 cup rice to 1.5 cups water.
These are starting points, not universal rules. If your cooker runs hot or your rice is freshly milled and thirsty, you may need a touch more water; if it is a very tight-sealing cooker, you may need slightly less.
Brown rice: extra water needs and longer cook times
Brown rice usually needs more water and a longer cooking cycle because the bran layer slows absorption. A common starting point is around 1 cup rice to 1.75 to 2 cups water, depending on the cooker and the grain.
Brown rice also benefits from a resting period after cooking. That pause helps finish absorption without making the grains break apart.
Jasmine, basmati, sushi rice, and sticky rice adjustments
Jasmine rice often needs slightly less water than short-grain rice because many cooks prefer a softer but separate texture. Basmati usually does best with a lighter hand on water, especially if you want long, distinct grains.
Sushi rice and sticky rice are different from fluffy table rice. Sushi rice usually needs enough water for tenderness and cling, while sticky rice is often prepared with a method designed for its special texture rather than a standard all-purpose ratio.
Parboiled, wild rice blends, and specialty grain mixes
Parboiled rice often needs a bit less water than brown rice but more than many white rice types. Wild rice blends and specialty mixes are the least predictable because different grains absorb at different rates.
For blends, follow the package if available, then adjust in small amounts after the first batch. Mixed grains can be very good in a rice cooker, but they rarely behave like a single-grain rice.
How to Measure Rice and Water Correctly Before Cooking
Good rice starts before the cooker is turned on. Measuring carefully is often the difference between a reliable batch and a disappointing one.
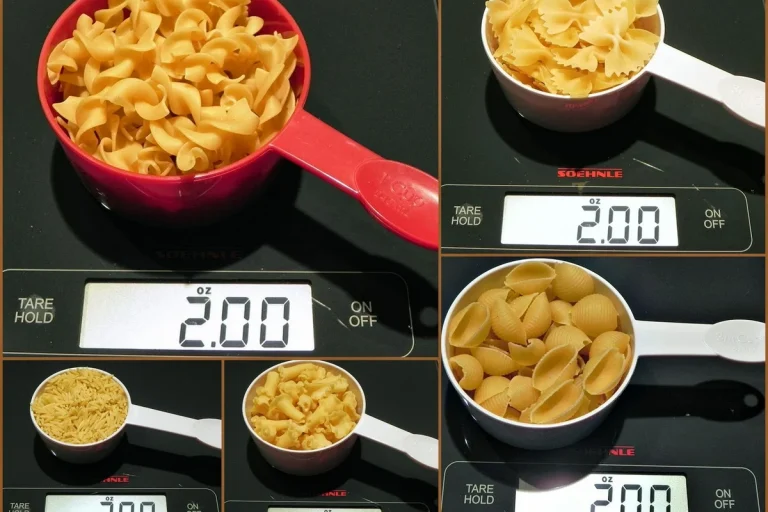
Using the cooker cup, standard measuring cups, and why they are not always the same
Many rice cookers include a cup that is smaller than a standard US measuring cup. That means one “rice cooker cup” may not match the cups used in baking or other kitchen measuring tools.
For consistency, use the cooker’s own cup with the water line markings if the manufacturer designed it that way. If you use standard measuring cups, keep the system consistent every time so your results stay repeatable.
Rinsing rice and how it affects the final water amount
Rinsing removes surface starch, which can help rice cook up cleaner and less gummy. However, if you rinse thoroughly and do not drain well, extra water clinging to the grains can slightly change the final ratio.
Let excess rinse water drain fully before adding the rice to the cooker. That simple step makes your measurement more accurate and reduces the chance of mushy rice.
Soaking, draining, and altitude or humidity adjustments
Soaking can shorten cooking time and improve texture for some rice types, especially brown rice and certain long-grain varieties. If you soak, use a little less added water because the grains have already absorbed some moisture.
Altitude, humidity, and even seasonal dryness can affect cooking. In dry climates or at higher elevations, you may need slightly more water or a longer rest period, while humid conditions may call for a little less.
Step-by-Step Rice Cooker Method for Better Texture Every Time
A simple method works best when you want repeatable results. The aim is to make the process easy enough that you can do it the same way every week.
Preparing the rice, adding water, and choosing the right setting
Start by measuring the rice, rinsing if desired, and placing it into the inner pot. Add the water based on the rice type and your cooker’s markings or your chosen ratio chart.
Then select the correct setting if your cooker offers options such as white rice, brown rice, quick cook, or mixed grains. If you are unsure, choose the standard setting first rather than the fastest one.
Use the same cup method every time so your ratio stays consistent.
Rinse until the water looks clearer, then drain well before cooking.
Use the correct ratio for the rice type and cooker style.
Let the cooker finish, then rest the rice before fluffing.
What the “cook” and “warm” phases actually do
The cook phase brings the water to the right temperature and allows the grains to absorb it. Once the cooker switches to warm, it is usually trying to hold the rice safely without continuing full cooking.
Warm mode is helpful, but it is not a substitute for resting the rice. If you fluff too early, steam escapes and the texture can become uneven.
Resting the rice after cooking for better fluffiness
After the cooker switches off or to warm, let the rice sit for about 5 to 10 minutes if the model and rice type allow it. That short rest helps moisture redistribute through the pot.
Then fluff gently with a rice paddle or fork. This releases trapped steam and helps the grains separate without smashing them.
Common Rice Water Ratio Mistakes and How to Fix Them
Most rice problems come from a few predictable mistakes. The good news is that they are usually easy to correct once you know what caused them.
Too mushy, too dry, or unevenly cooked rice
Mushy rice often means too much water, too much rinse water left in the pot, or a cooker that runs a little cool. Dry rice usually means not enough water, too much evaporation, or opening the lid too soon.
Uneven rice can happen when the cooker is overloaded or the grains were not leveled before cooking. If this happens often, try smaller batches and a more exact measuring method.
Rice is mushy or gummy
Too much water or excess rinse water
Reduce water slightly and drain rice better
Overfilling the cooker or ignoring the max line
Rice expands as it cooks, and steam needs space to circulate. If you ignore the max line, the cooker may overflow or cook unevenly.
This is especially important for brown rice, mixed grains, and large family-size batches. A safe fill level protects both texture and cleanup.
Using the wrong ratio after rinsing or soaking
Rinsed rice often needs a slightly different approach than unwashed rice, mainly because the surface starch and surface water change the final balance. Soaked rice also needs less added water than dry rice.
If you change your prep method, change your ratio too. Small adjustments are better than making a large correction all at once.
Opening the lid too early and losing steam
Steam is part of the cooking process. If you open the lid before the rice has finished resting, you release heat and moisture that the grains still need.
Use the window before opening the lid to let the cooker finish its cycle and settle. That one habit improves consistency more than many people expect.
Hot steam can cause burns when you lift the lid or stir immediately after cooking. Open the cooker carefully and keep your face and hands away from the vent.
Time, Cost, and Convenience: Choosing the Best Method for Your Kitchen
The best rice cooker method is not only about texture. It is also about time, cleanup, and whether the appliance fits your routine.
Cook time comparisons for white rice, brown rice, and mixed grains
White rice is usually the fastest and most predictable. Brown rice takes longer because it has more intact bran, and mixed grains may take even longer if the blend includes tougher grains or seeds.
If you cook rice often, that time difference matters. A cooker that handles your most common rice type well may be worth more than a machine with extra features you never use.
Energy use and cleanup differences between cooker styles
Electric rice cookers are often convenient because they are hands-off and easy to clean. Microwave and stovetop methods may use fewer appliances in some kitchens, but they usually require more attention.
Cleanup also depends on the cooker’s nonstick coating, vent design, and removable parts. Simpler designs can be easier to maintain, though they may offer fewer automatic controls.
When a rice cooker is worth it for daily meal prep
A rice cooker is often worth it if you make rice several times a week, want consistent results, or cook while doing other kitchen tasks. It is also useful for meal prep because it frees up the stovetop.
If you only cook rice occasionally, a basic pot may be enough. But for regular use, the convenience and repeatability of a rice cooker are hard to beat.
Standard electric cooker: best for everyday rice and simple operation, but less flexible than advanced models.
Fuzzy logic cooker: best for varied rice types and more automatic adjustment, but usually more complex to use.
Safety, Maintenance, and Final Rice Cooker Best Practices
A good rice ratio is only part of the story. Safe handling and regular cleaning help the cooker last longer and work more reliably.
Steam safety, lid handling, and avoiding overflow
Always lift the lid away from your face because the steam can be intense. If the cooker is near its maximum capacity, watch for boil-over and keep the vent area clear.
If your cooker repeatedly overflows, reduce the batch size, check the water ratio, and confirm that the inner pot is seated properly.
Cleaning the inner pot, vent, and measuring tools
Wash the inner pot according to the manufacturer’s guidance, and avoid abrasive tools that can damage the surface. Clean the lid, vent, and condensation areas so starch does not build up and affect future cooking.
Also clean the measuring cup and rice paddle regularly. Consistent tools help keep your measurements consistent, which is one of the easiest ways to improve results.
Final recap: the easiest way to master the rice water ratio cooker method
The simplest path to better rice is to choose the correct ratio for the rice type, measure consistently, and let the cooker finish and rest before opening the lid. Once you find the right baseline for your cooker, small adjustments become easy.
In 2026, the best rice water ratio cooker method is still the same in principle: measure carefully, respect the cooker’s limits, and make one change at a time until the texture matches what you want.
Frequently Asked Questions
A common starting point is 1 cup rice to 1.25 cups water for long-grain white rice, with more water for brown or short-grain rice. The best ratio still depends on the cooker model and the rice type.
Rinsing is optional, but it usually removes excess surface starch and can improve texture. If you rinse, drain well so extra water does not throw off the ratio.
Mushy rice usually means too much water, too much rinse water left in the pot, or a cooker that runs cool. Try reducing the water slightly and let the rice rest before fluffing.
Brown rice often needs about 1 cup rice to 1.75 to 2 cups water, depending on the cooker and the grain. It also usually needs a longer cook time than white rice.
Not always. Jasmine often likes a little more water than basmati, so start with a slightly different ratio and adjust based on texture.
If the cooker has electrical damage, a burnt cord, a failing heating plate, or repeated overheating, stop using it. For appliance wiring or repair beyond basic cleaning, contact a qualified appliance technician.